Almost every business application eventually needs approvals. Someone requests leave, a purchase or a document review, and one or more people have to decide on it. These processes often start in email and spreadsheets, or they turn into custom code that has to change every time the process does.
ASP.NET Zero v15.5 includes a built-in workflow and approval builder for exactly this. Tenant administrators design request types in a visual designer, employees start requests from a catalog, and approvers decide on them from their inbox. The feature works the same way in the MVC, Angular and React UIs.
In this post, we will build a leave request workflow from scratch, publish it and run it end to end, without writing any code.
The Scenario
Employees should request leave in the application instead of by email, with these rules:
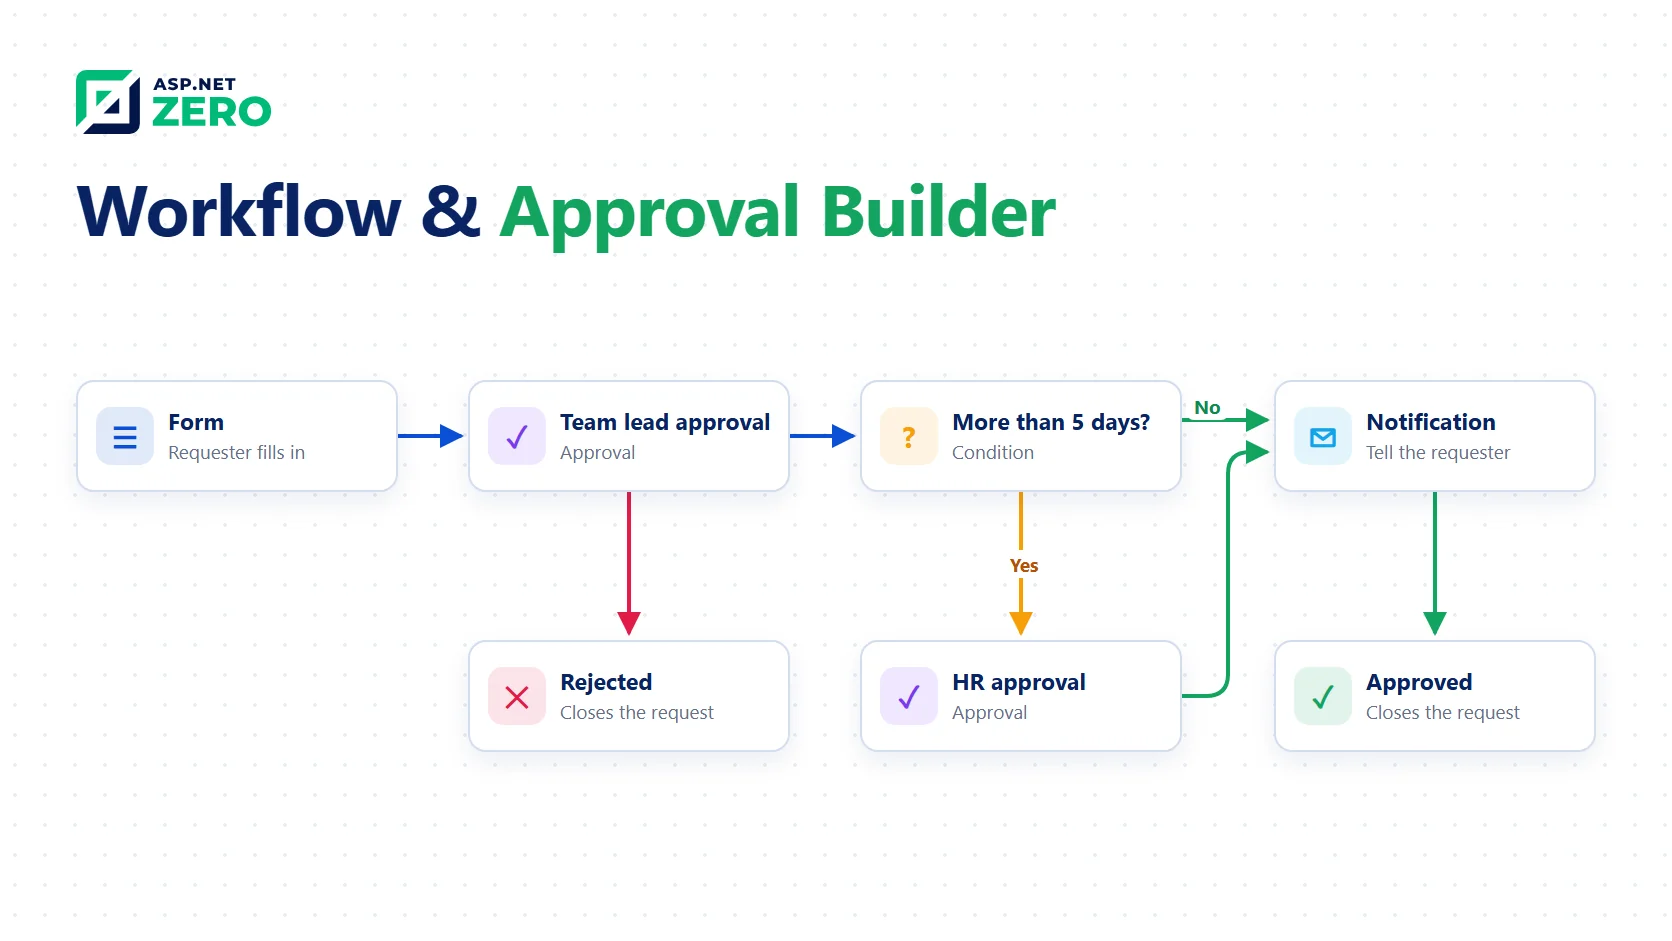
- Every request is approved by a team lead.
- Requests for more than 5 days are also approved by HR.
- An approver who spots a mistake can send the request back to the requester for changes instead of rejecting it.
- The employee is notified when the leave is approved.
We will use four users:
| User | Role | Purpose |
|---|---|---|
admin |
Admin | Designs and publishes the workflow |
alice |
Employees | Requests leave |
bob |
Team Leads | Team lead approval |
carol |
HR | HR approval |
Step 1: Prepare Roles and Users
Workflow pages are tenant pages, so log in to a tenant as admin. Under Administration > Roles, create three roles and grant these permissions:
| Role | Permission |
|---|---|
| Employees | Workflows > Workflow Requests > Starting workflow requests |
| Team Leads | Workflows > Approval Inbox > Acting on workflow tasks |
| HR | Workflows > Approval Inbox > Acting on workflow tasks |
Then create alice, bob and carol under Administration > Users and assign each user their role.
By default, nobody can approve their own request, so use separate users for the requester and the approvers.
Step 2: Create the Workflow
Go to Workflows > Workflow Administration > Workflow Definitions and click New workflow. Enter Leave request as the display name, set the category to HR and choose Start blank.
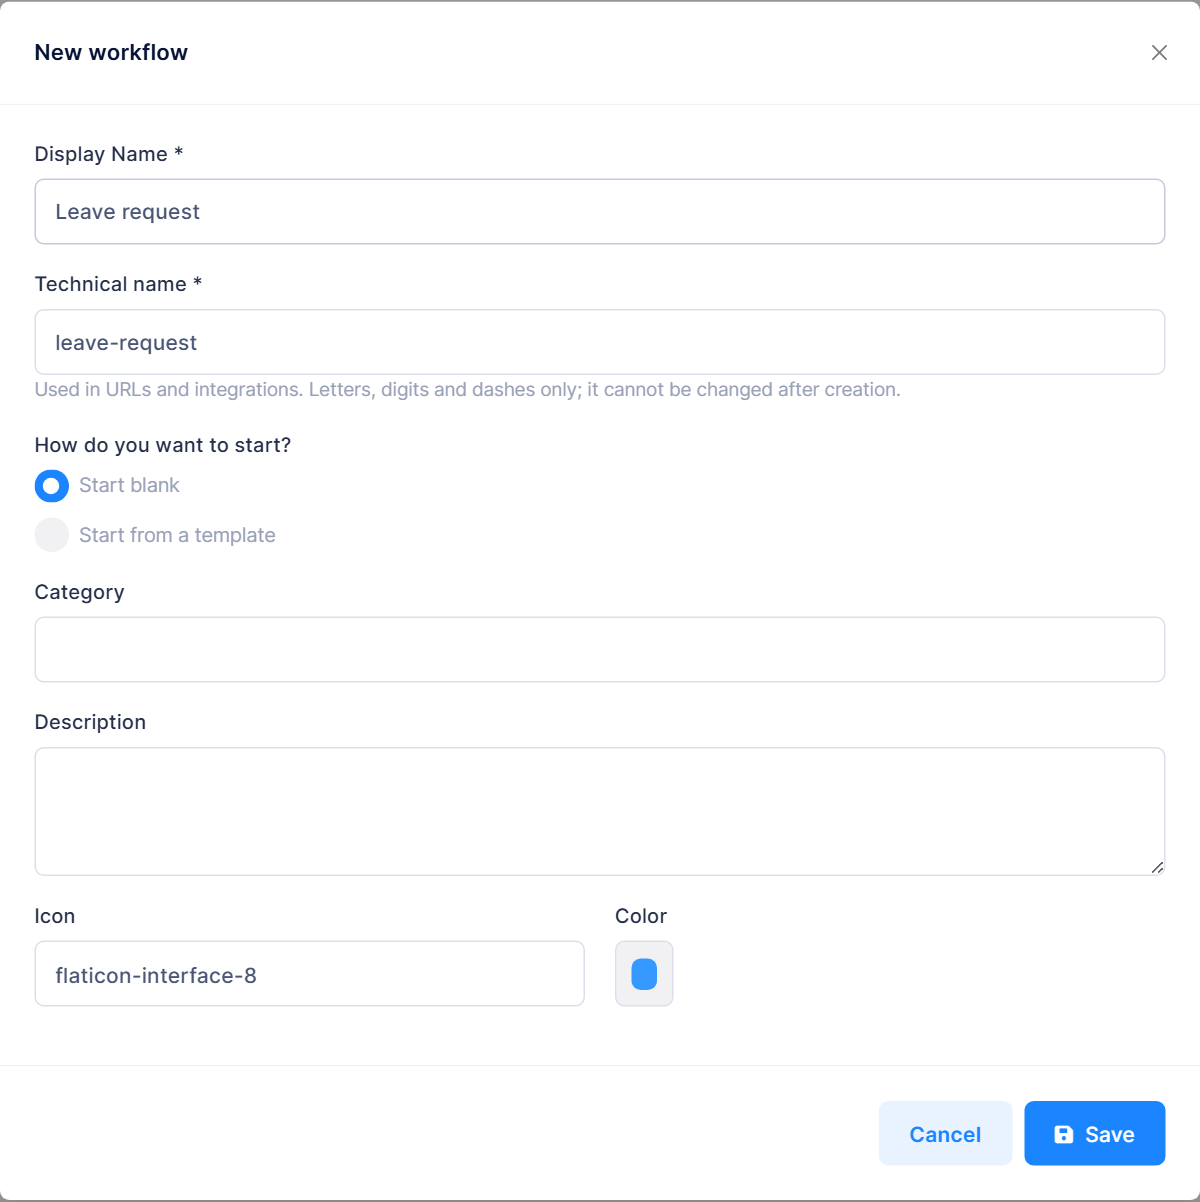
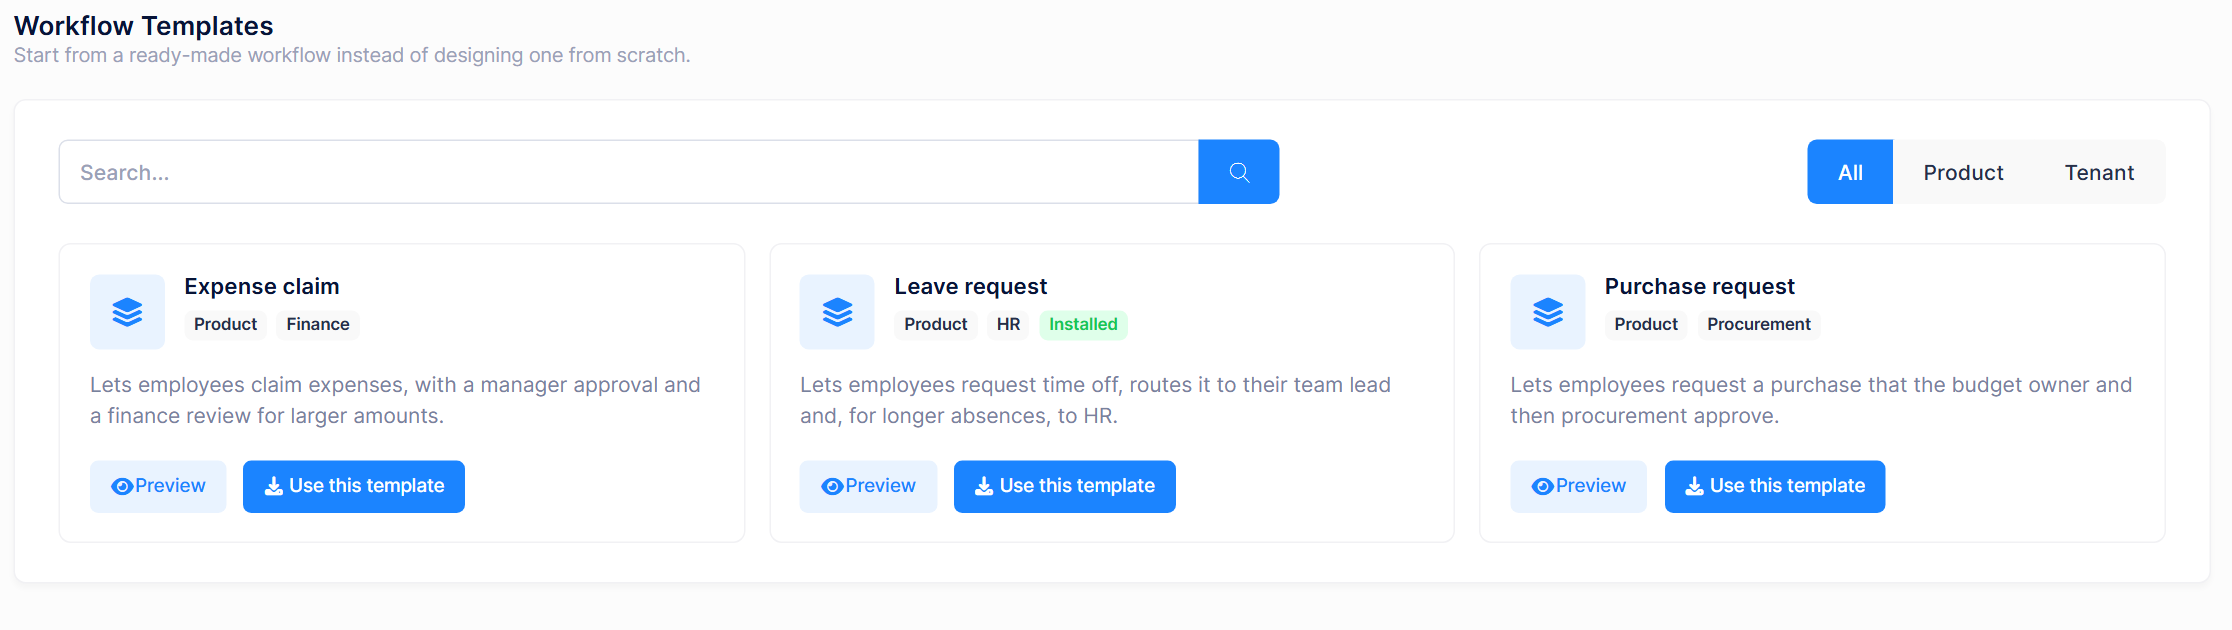
The dialog also offers Start from a template. Every tenant starts with ready-made Leave request, Expense claim and Purchase request templates, and you can save your own designs as templates too. The built-in Leave request template is very close to what we are building here, so you can use it as a shortcut once you know how the pieces fit together. You only need to assign its approvers.
Step 3: Build the Form
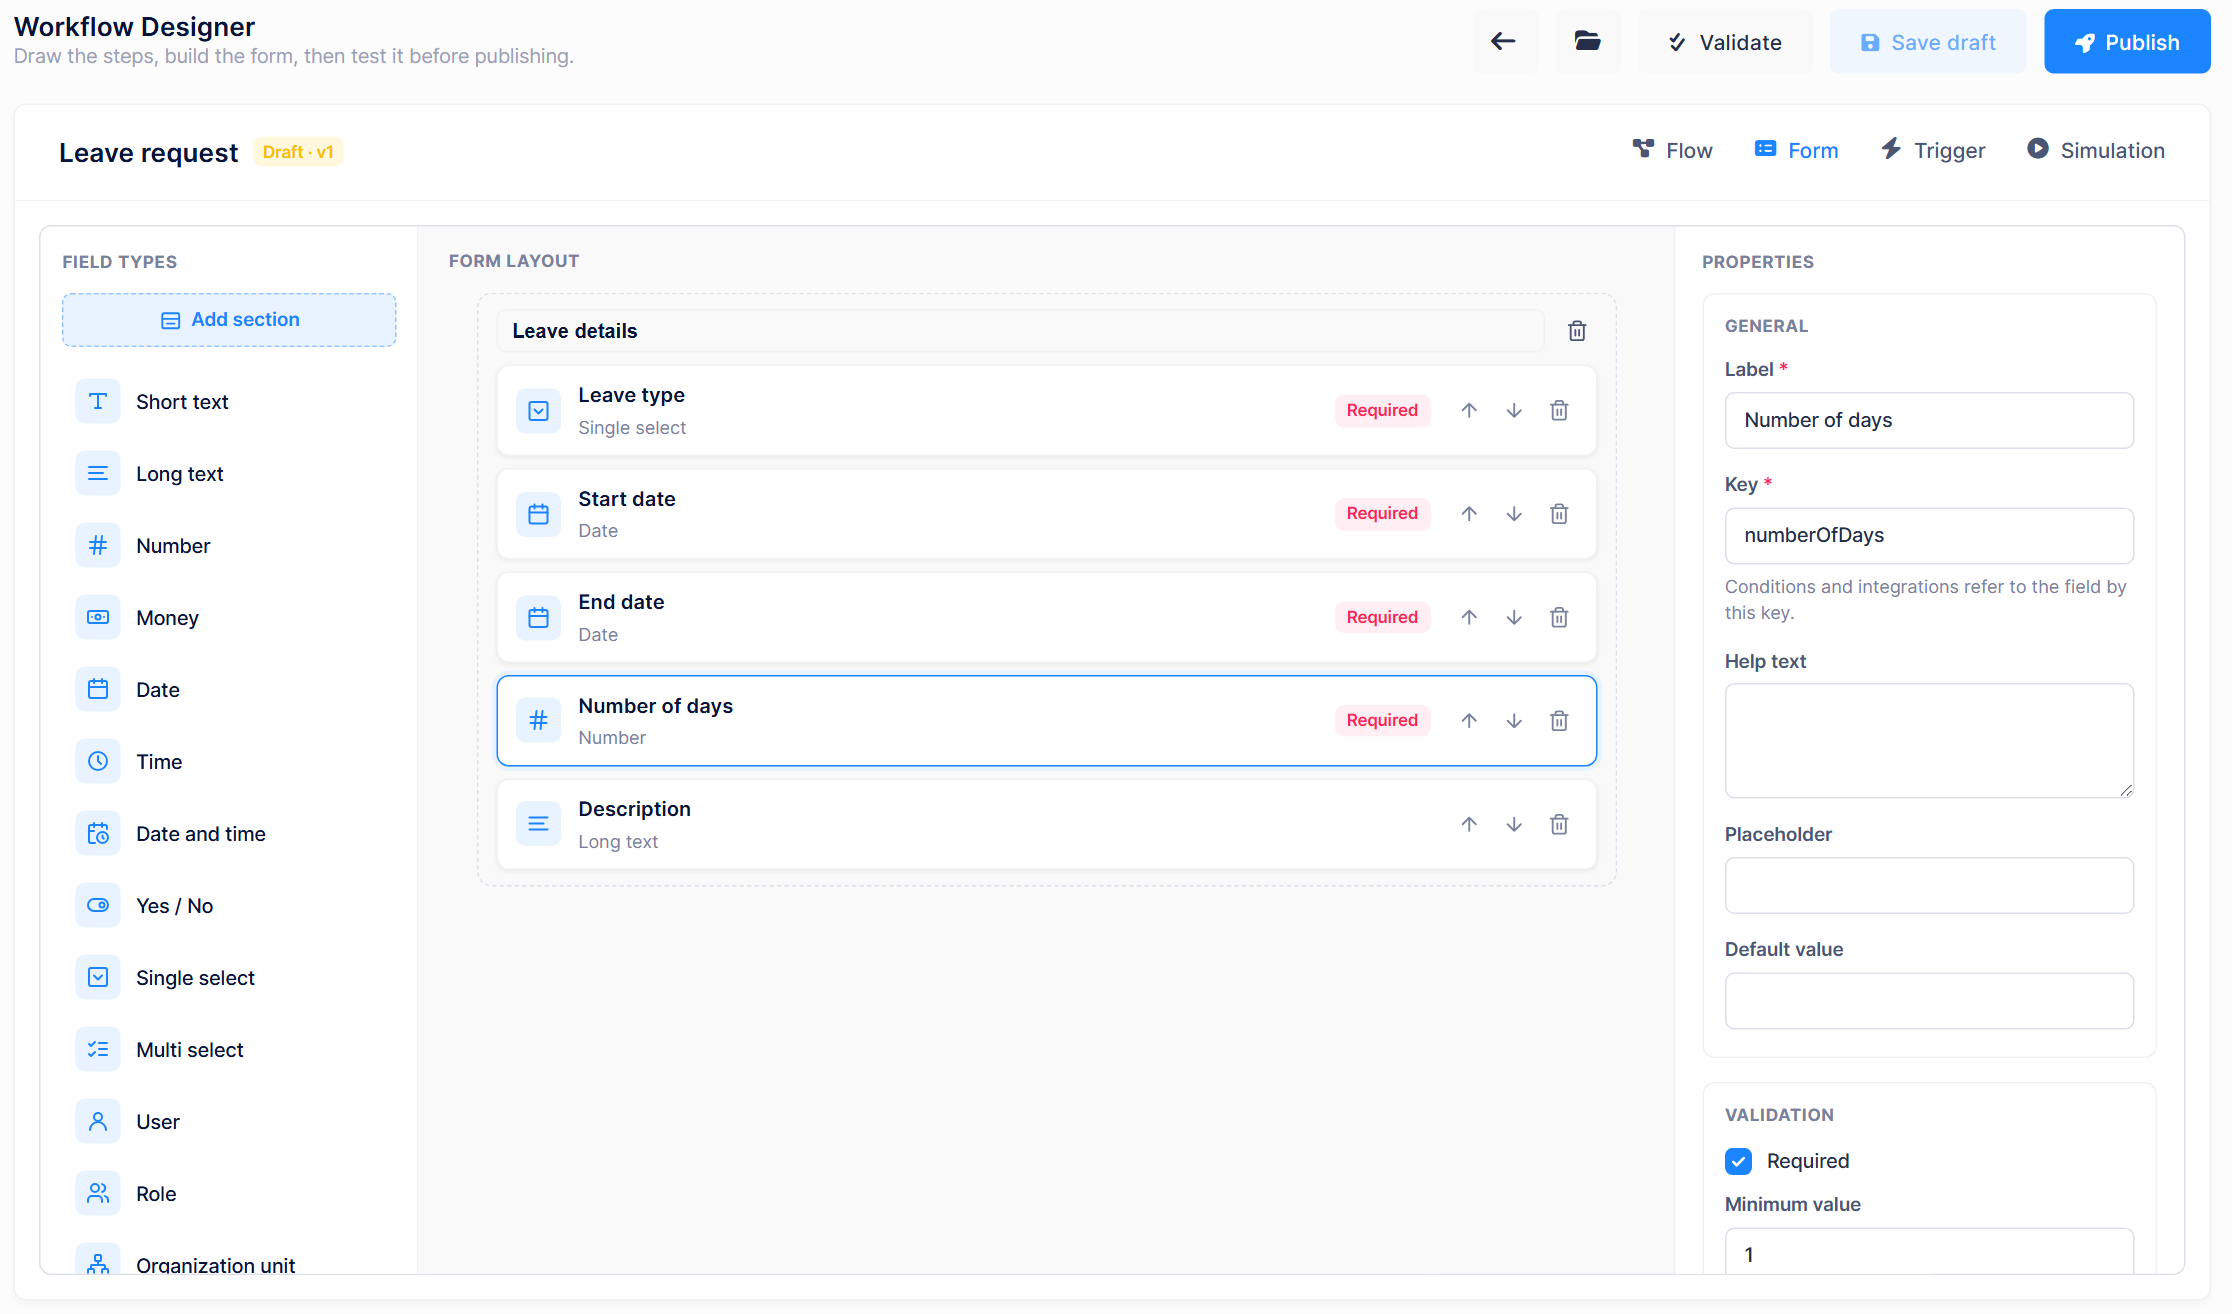
The Workflow Designer has four tabs: Flow, Form, Trigger and Simulation. Open the Form tab, click a field type to add it, and set its properties on the right:
| Label | Field type | Properties |
|---|---|---|
| Leave type | Single select | Options: Annual, Excuse, Sick. Required |
| Start date | Date | Required |
| End date | Date | Required |
| Number of days | Number | Required, minimum value 1 |
| Description | Long text |
Each field also has a Key, such as numberOfDays. Conditions and integrations use this key to refer to the field.
Step 4: Draw the Flow
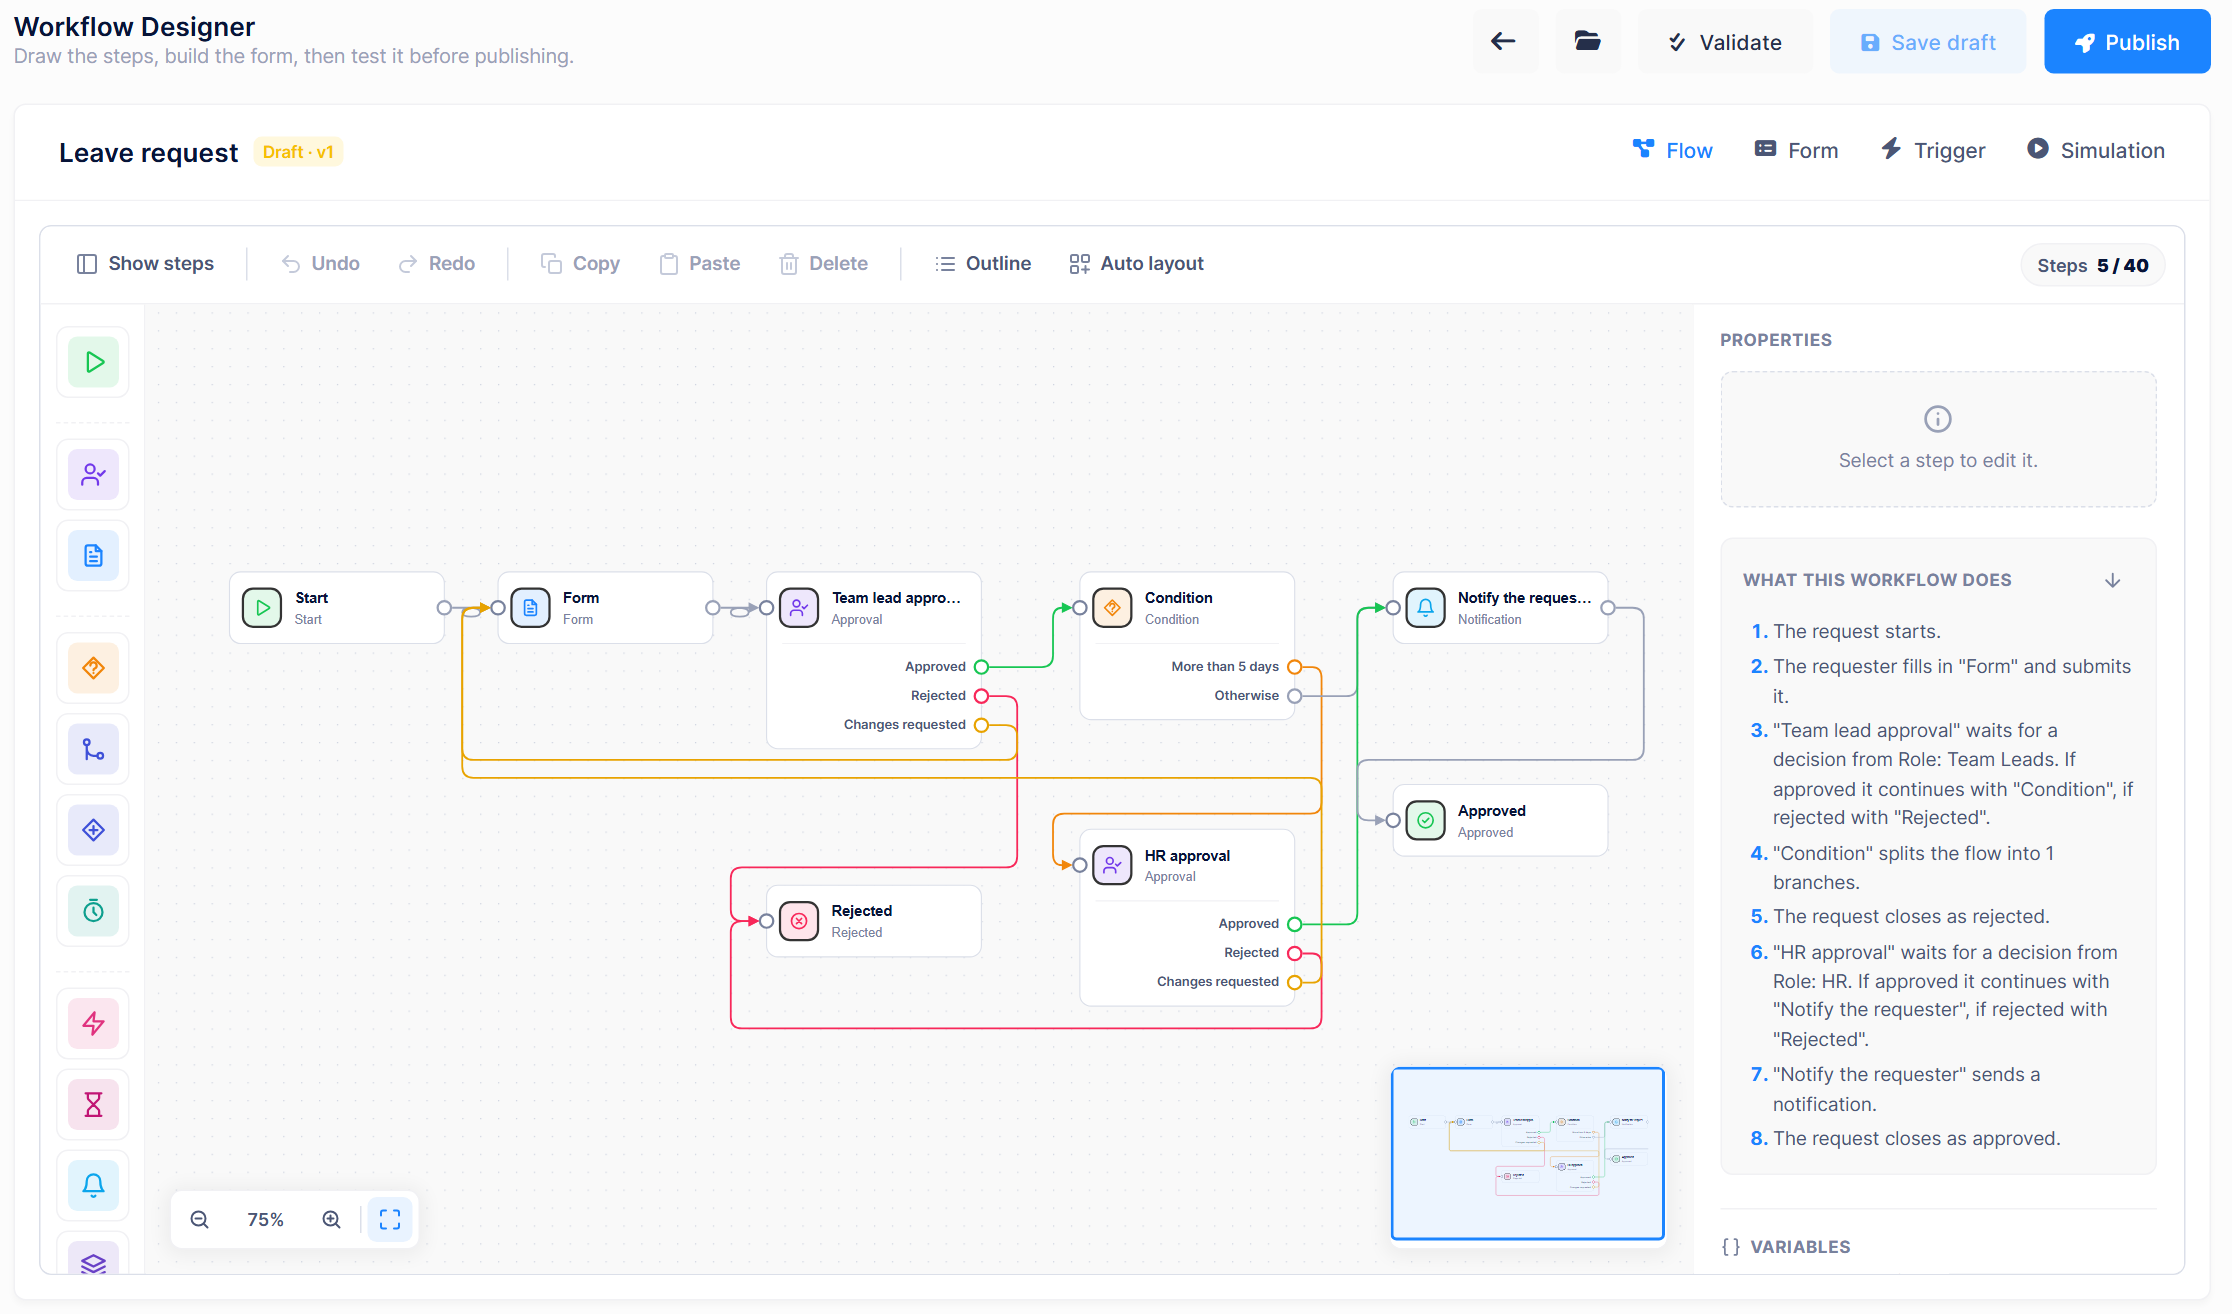
Open the Flow tab. The steps palette on the left groups the available step types. Add a Start, a Form, two Approval steps named Team lead approval and HR approval, a Condition, a Notification named Notify the requester, and the Approved and Rejected outcomes.
Now configure the steps that need settings.
Approvals: Select each approval step, open the Assignment tab and add the assignee. We use the Team Leads role for the first approval and the HR role for the second. An approval step can also be assigned to a specific user, an organization unit or the requester's manager.
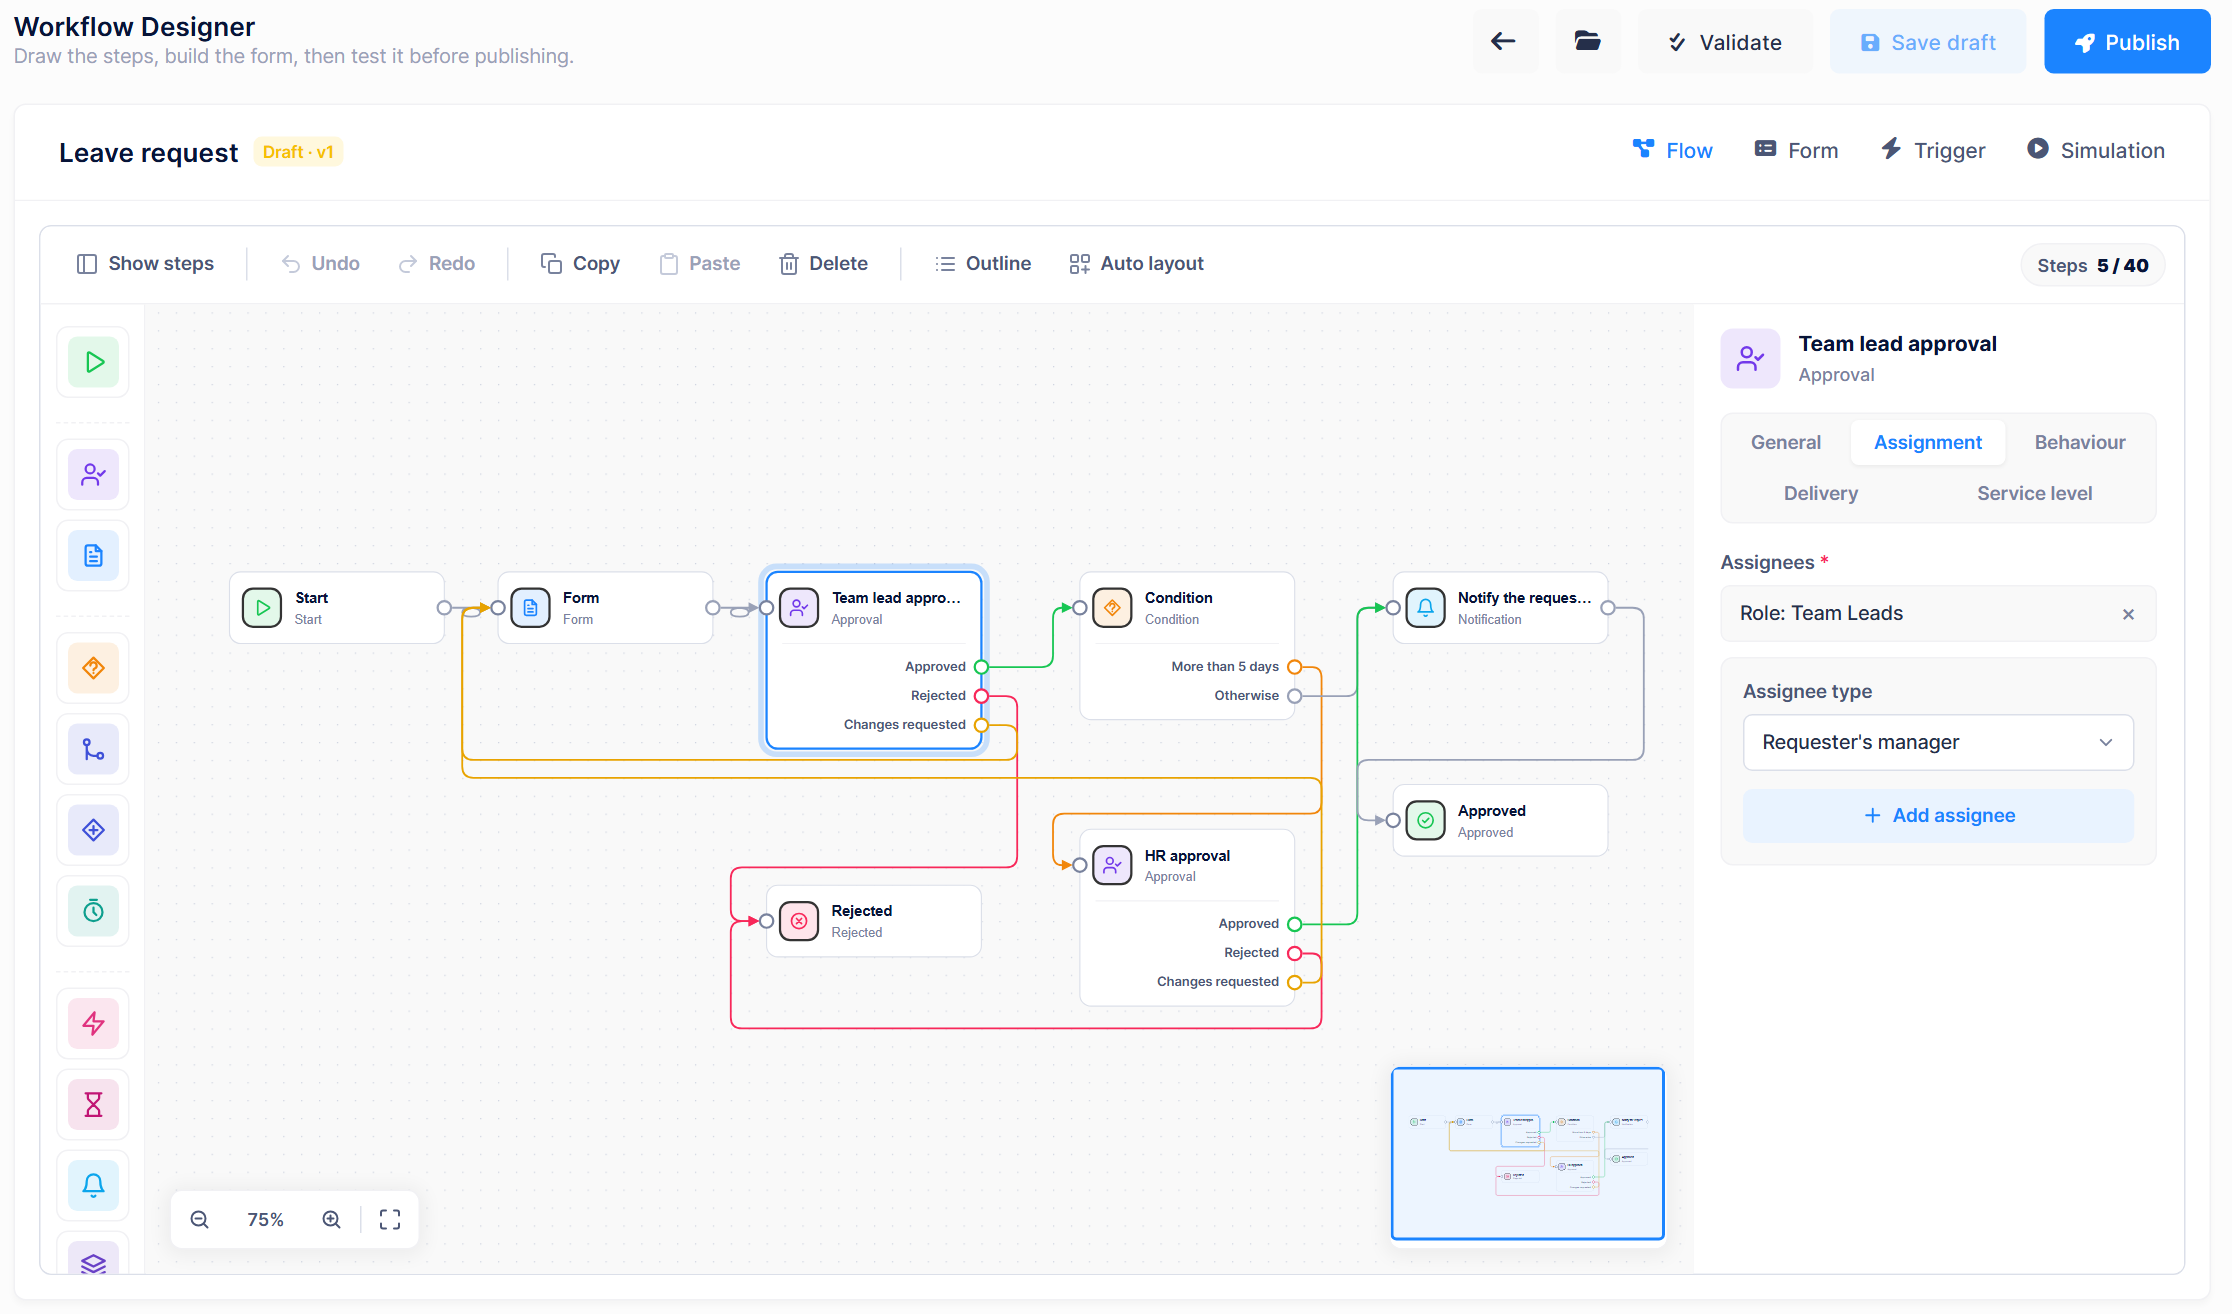
The Behaviour tab controls how the decision is made. Its defaults fit this scenario: Anyone can decide, Allow "request changes" is on and a reason is required when rejecting. You could also require every assignee or a quorum to approve. The Service level tab adds due dates, reminders and escalations.
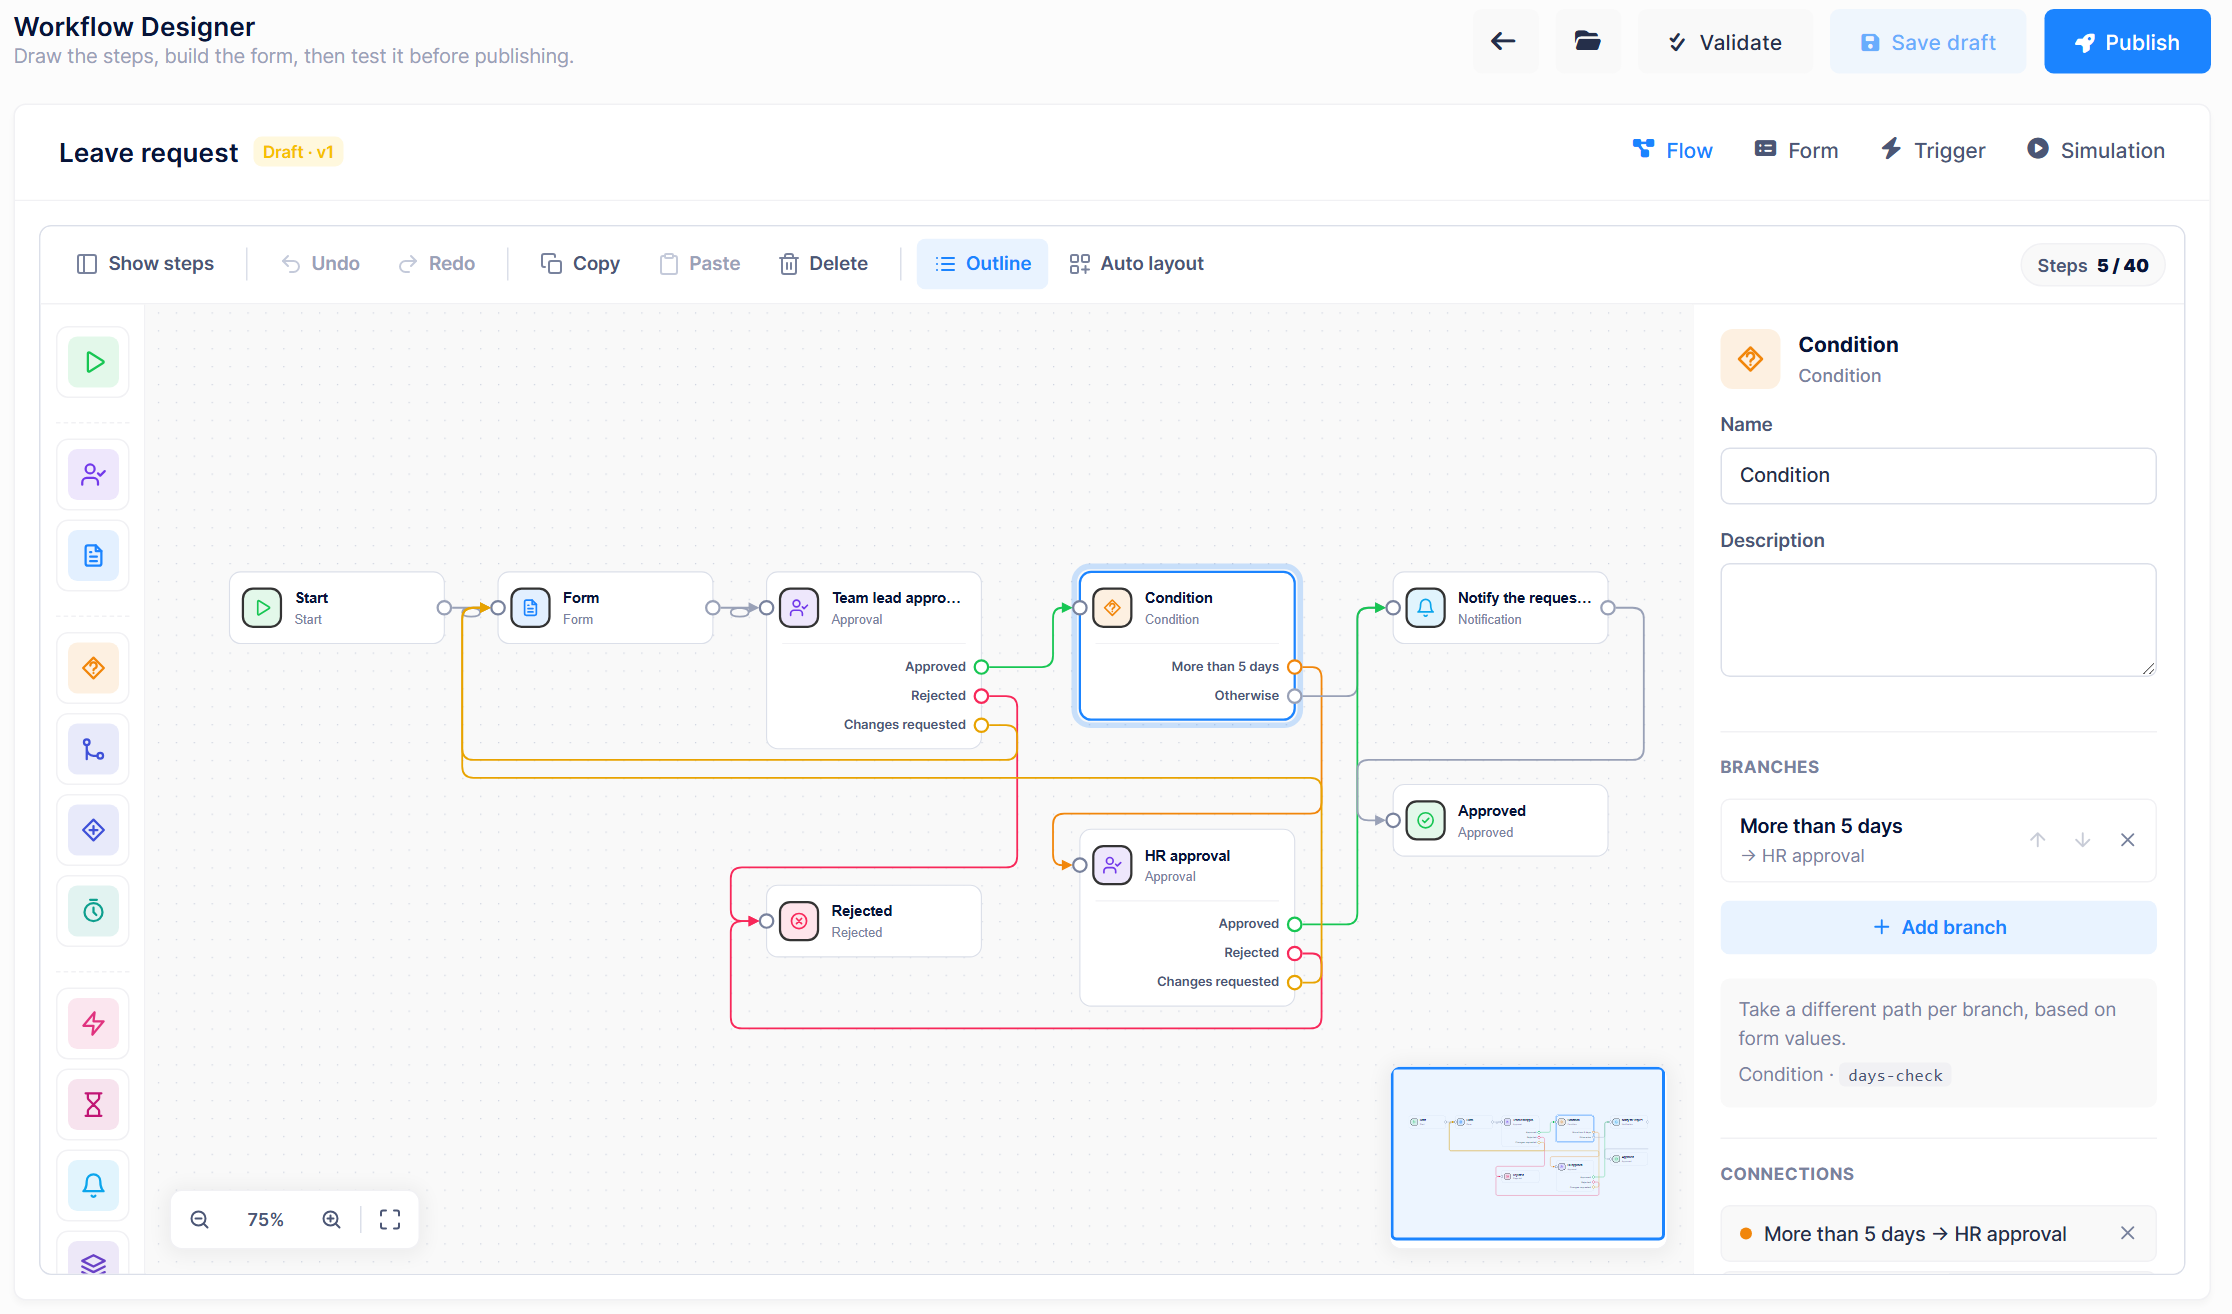
Condition: Select the condition, click Add branch, name it More than 5 days, and set it to Number of days, Greater than, 5. The step now has two outputs: More than 5 days and Otherwise.
Notification: Give it the name LeaveApproved, the subject Your leave request was approved and a message such as Your request {businessReference} for {workflowName} was approved. On the Recipients tab, tick The requester.
Connections: Finally, drag from each step's output port to the input port of the next step:
| From | Output | To |
|---|---|---|
| Start | Form | |
| Form | Team lead approval | |
| Team lead approval | Approved | Condition |
| Team lead approval | Rejected | Rejected |
| Team lead approval | Changes requested | Form |
| Condition | More than 5 days | HR approval |
| Condition | Otherwise | Notify the requester |
| HR approval | Approved | Notify the requester |
| HR approval | Rejected | Rejected |
| HR approval | Changes requested | Form |
| Notify the requester | Approved |
The Auto layout button can line up the diagram for you, and the What this workflow does panel describes the flow in plain language so you can check it as you go.
Step 5: Validate, Simulate and Publish
Before anyone uses the workflow, make sure it behaves as intended.
Click Validate. It runs the same checks as publishing, and each problem names the step it belongs to, such as an approval without an assignee or an output that is not connected. When everything is fine, you see No problems found. The workflow is ready to publish.
Then open the Simulation tab. It runs the workflow without creating a request. Choose alice as the requester, set the decisions for each approval, enter 7 for Number of days and click Run simulation. The result shows the exact path and who each step would be assigned to.
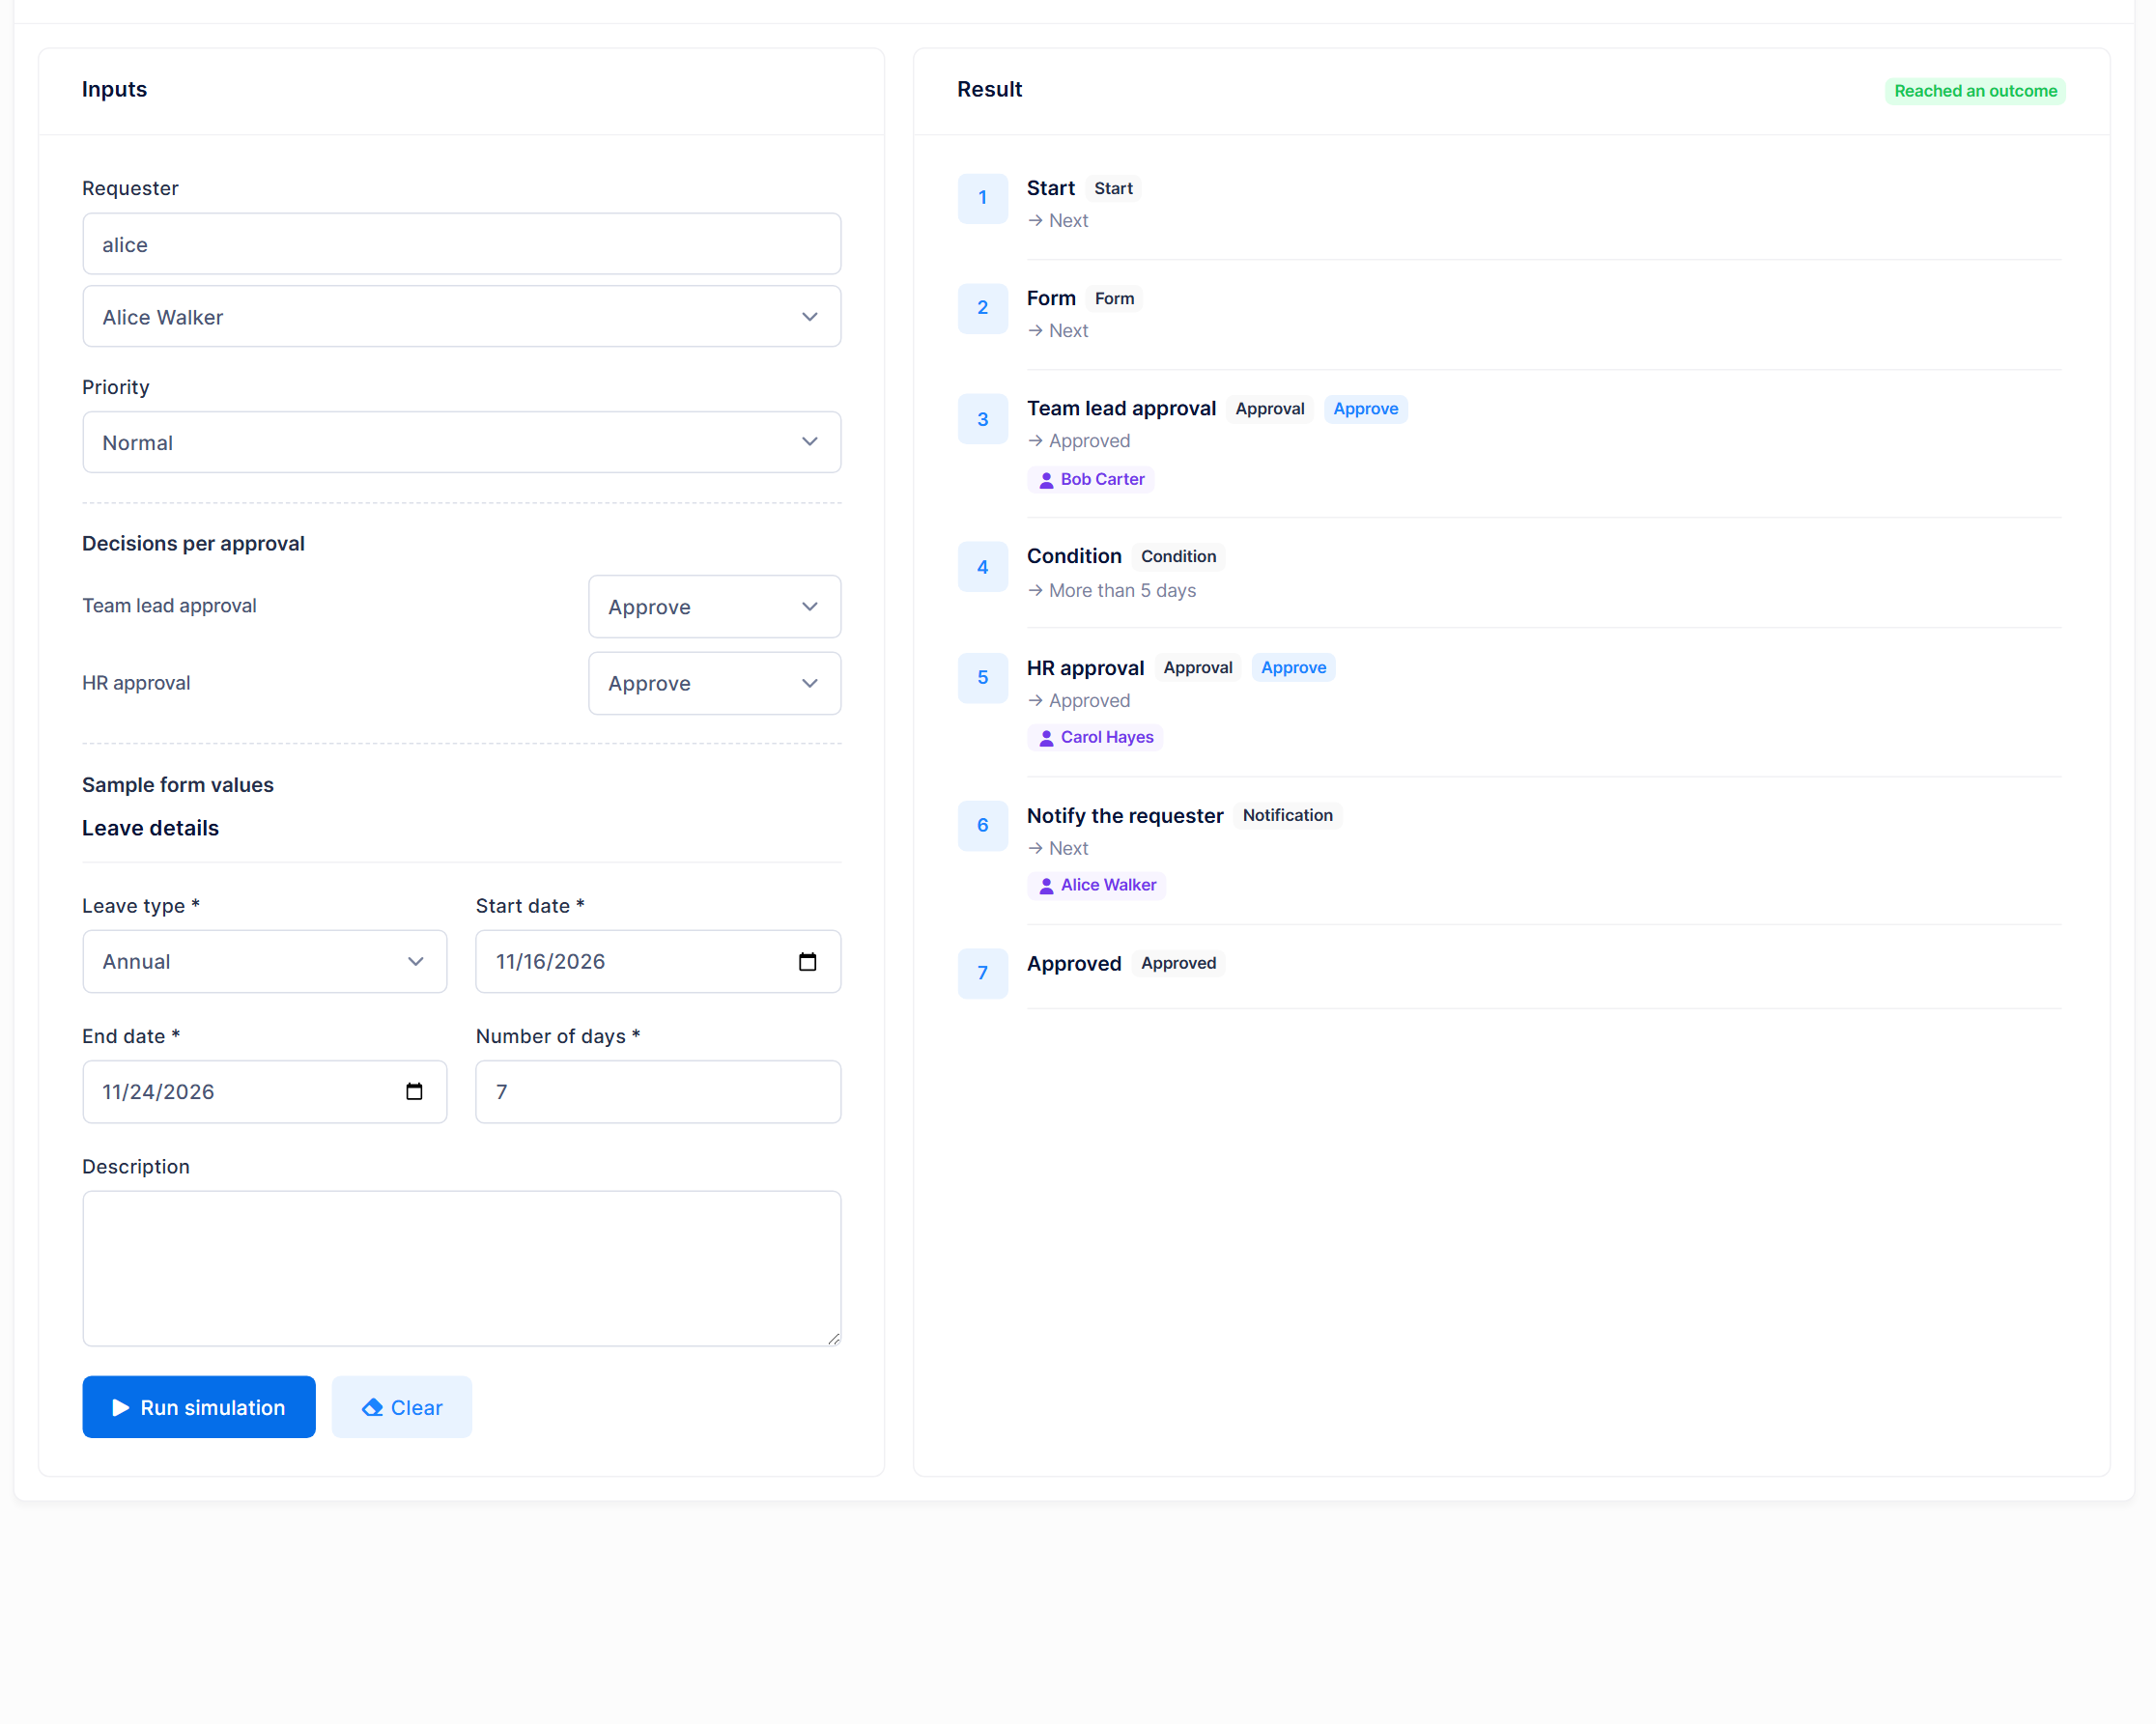
Run it again with 3 days and you will see that the HR approval is skipped.
Now click Publish. The workflow becomes Active as v1 and appears in the Request Catalog.
Step 6: Run the Workflow
Alice requests leave
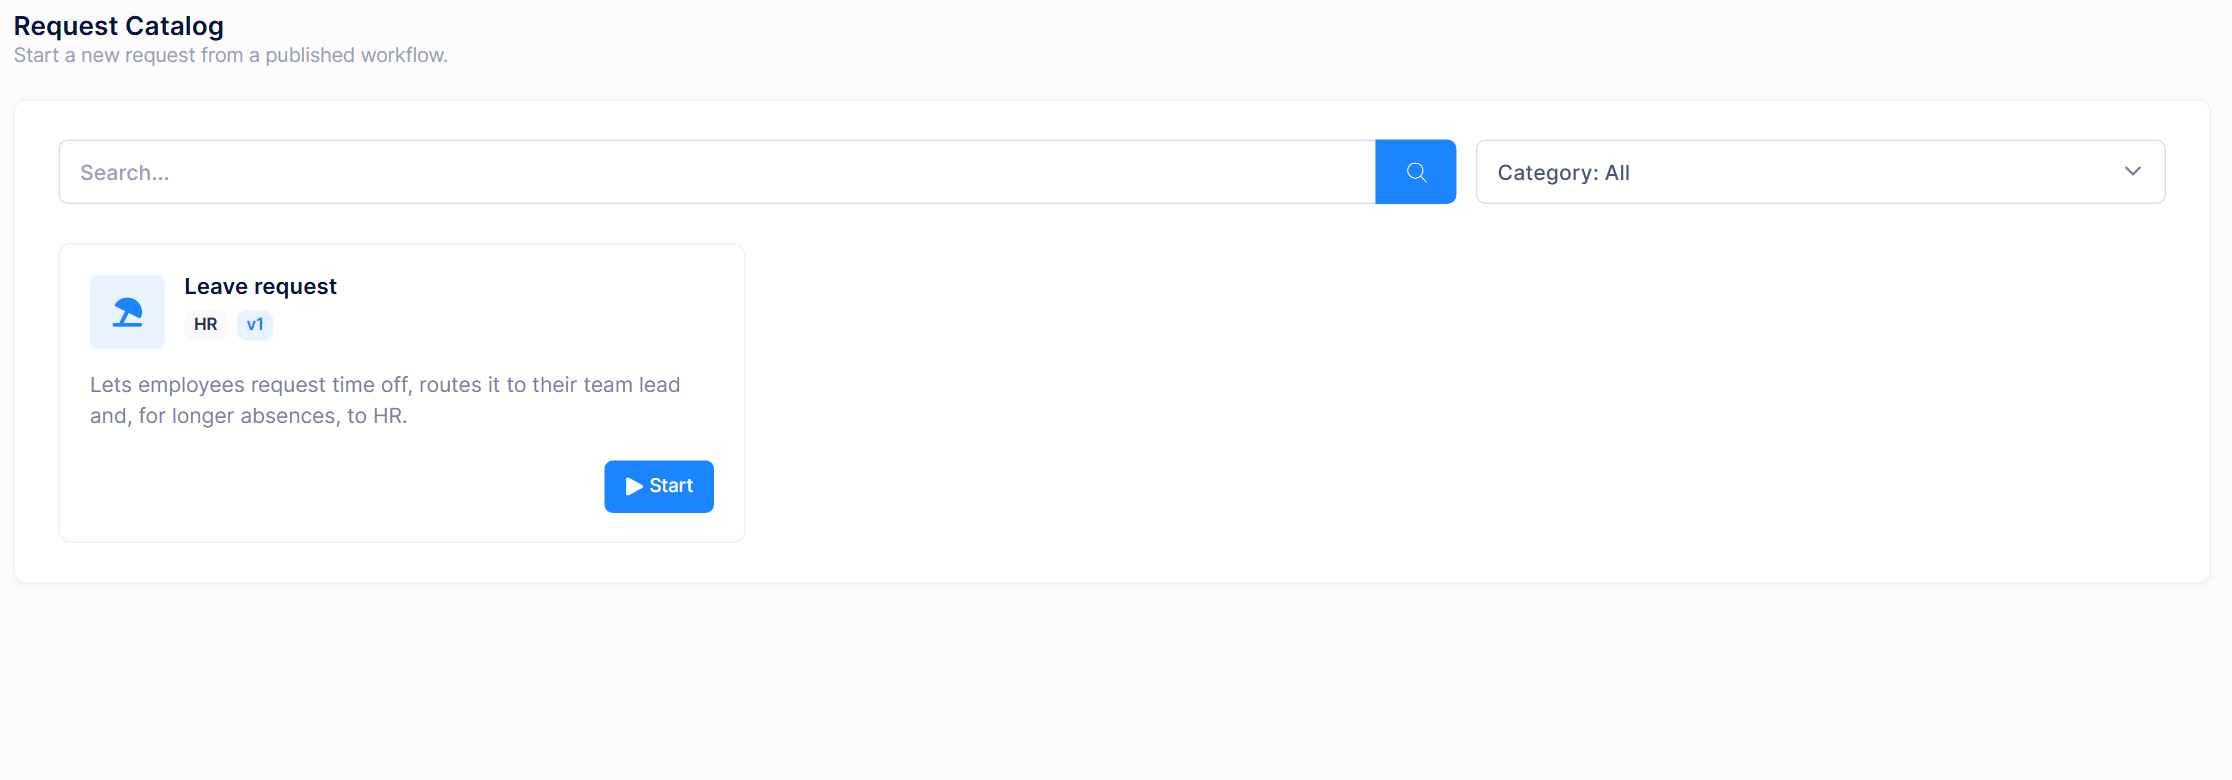
Alice logs in, goes to Workflows > Start a Request and clicks Start on the Leave request card.
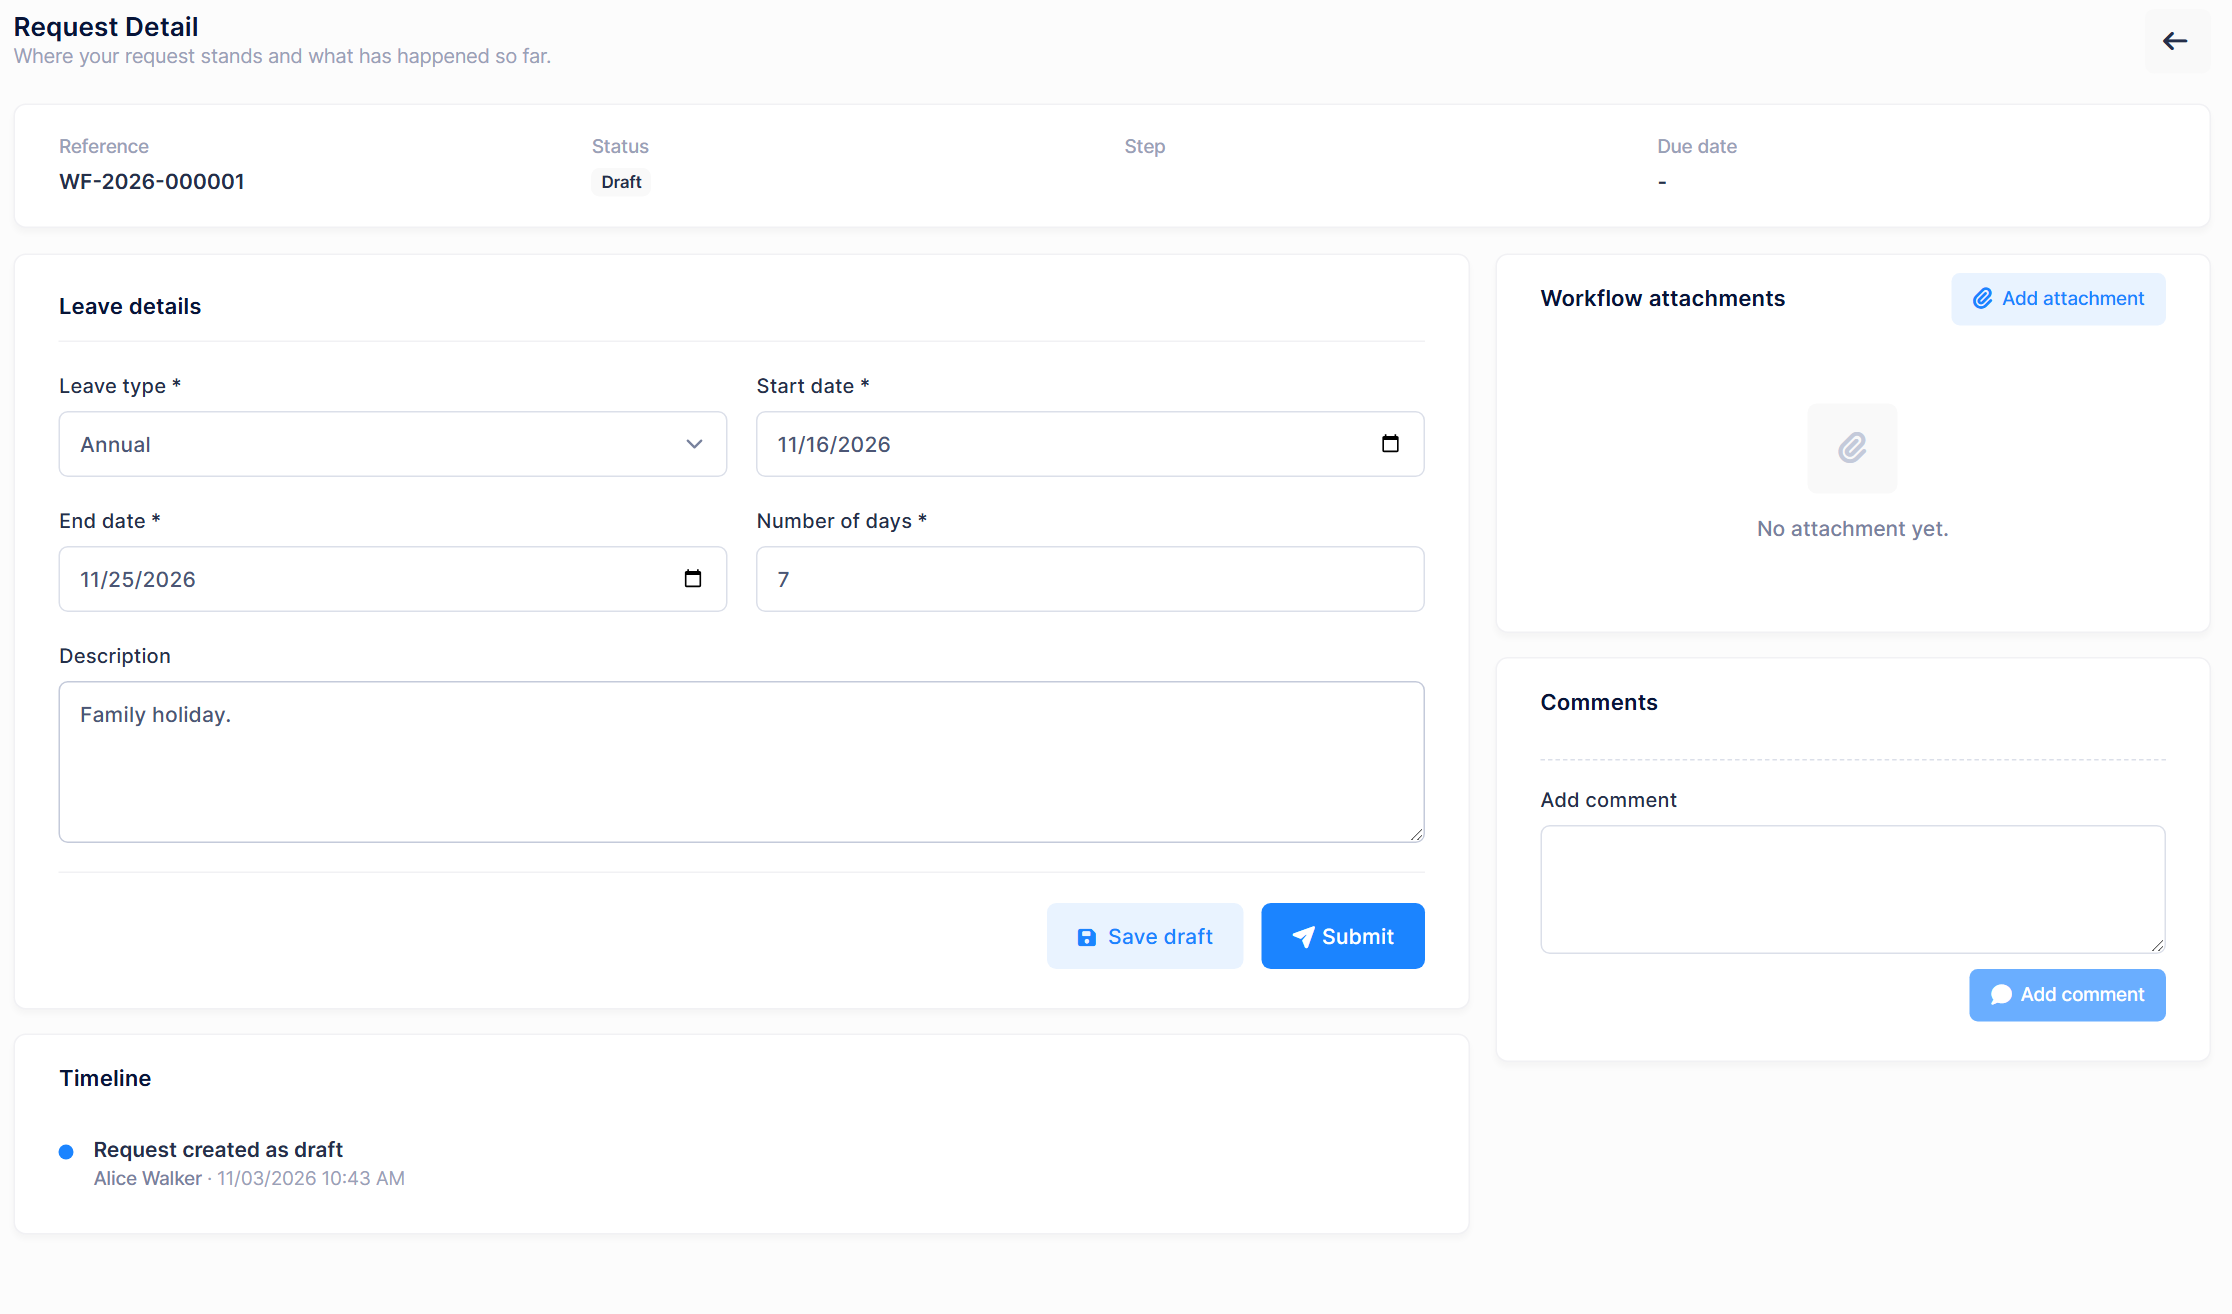
She fills in the form for seven days of leave and clicks Submit. Each request gets a reference number and can be followed from My Requests.
Bob asks for a correction
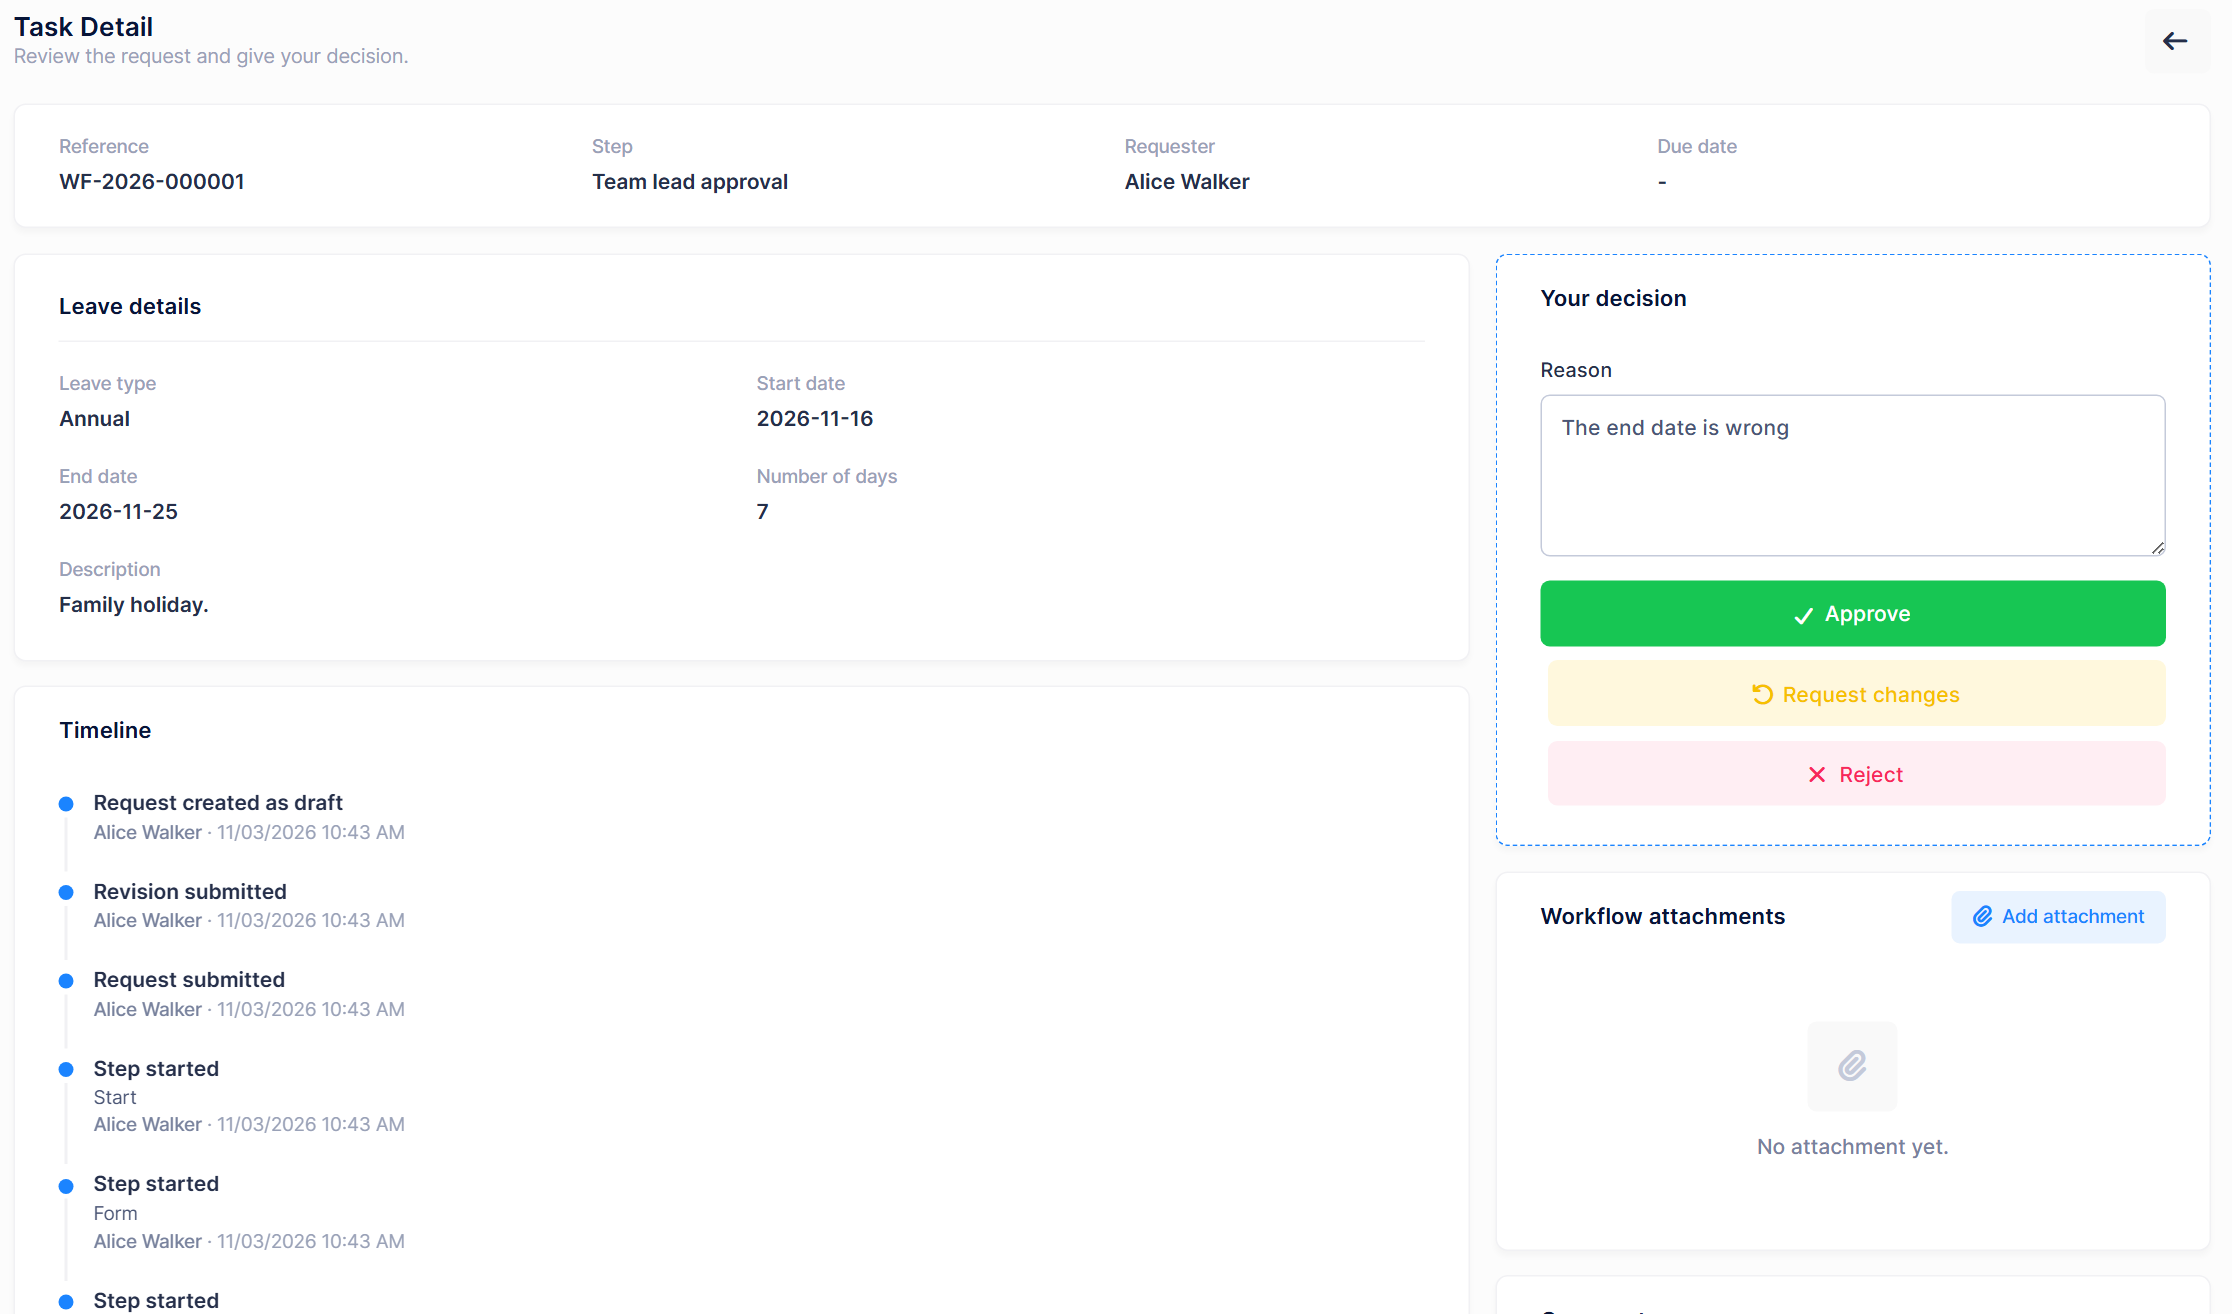
Bob receives a notification and finds the task in his Approval Inbox, which also counts pending, overdue and due soon tasks.
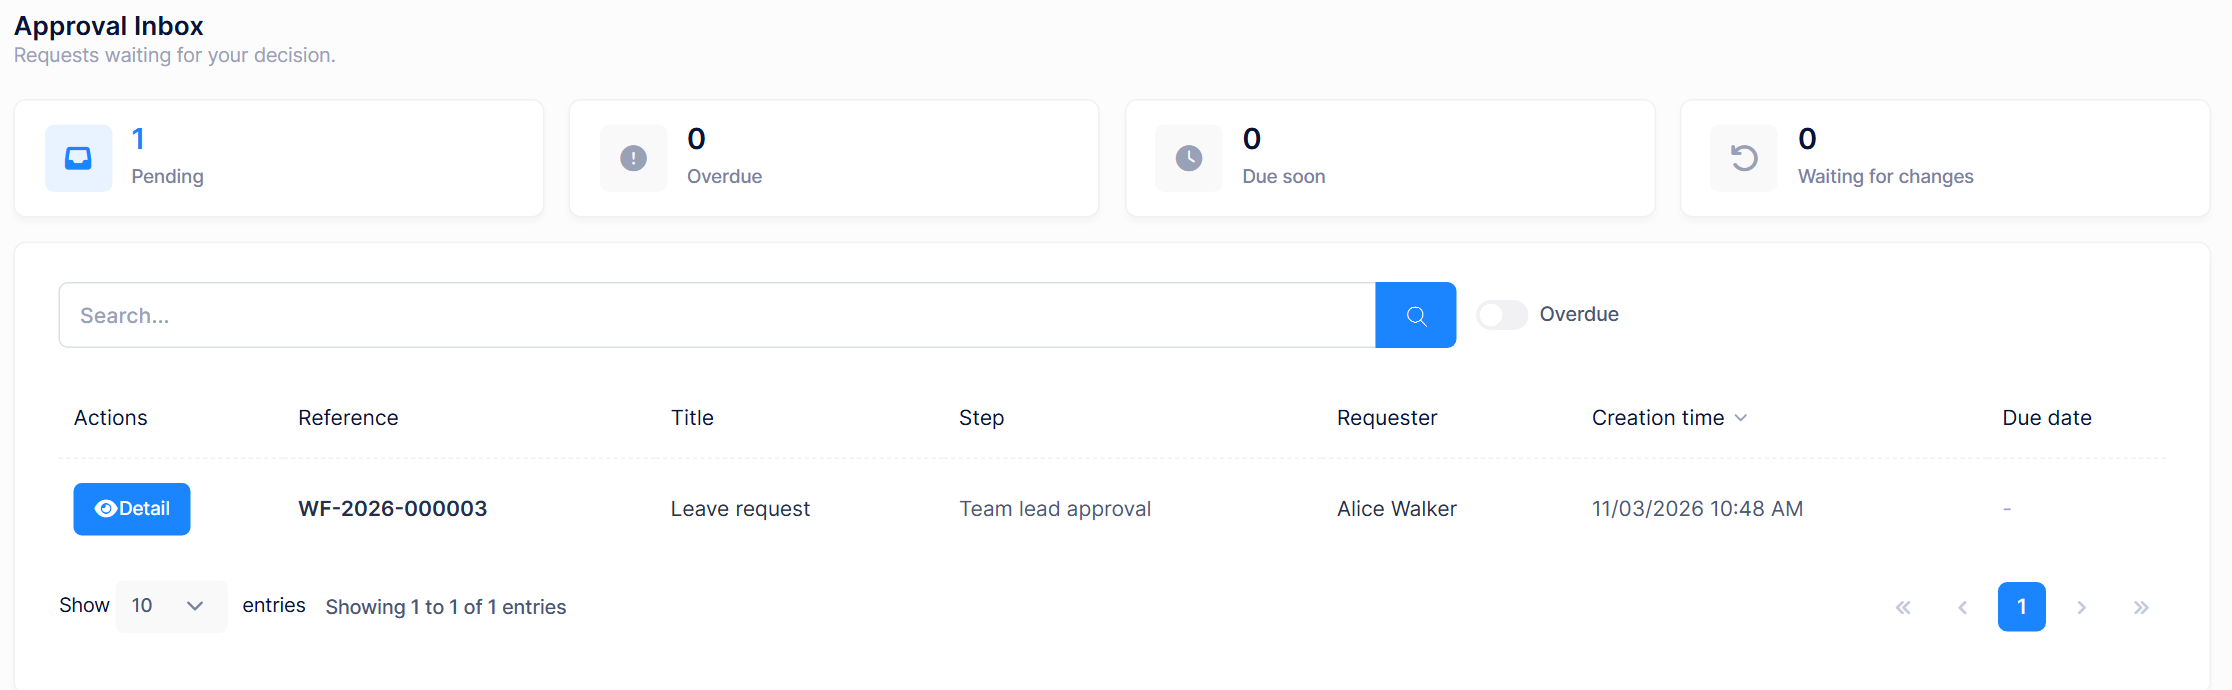
He opens the request and notices that the end date is wrong. Rather than rejecting the request, he enters a reason and clicks Request changes.
Alice corrects the request
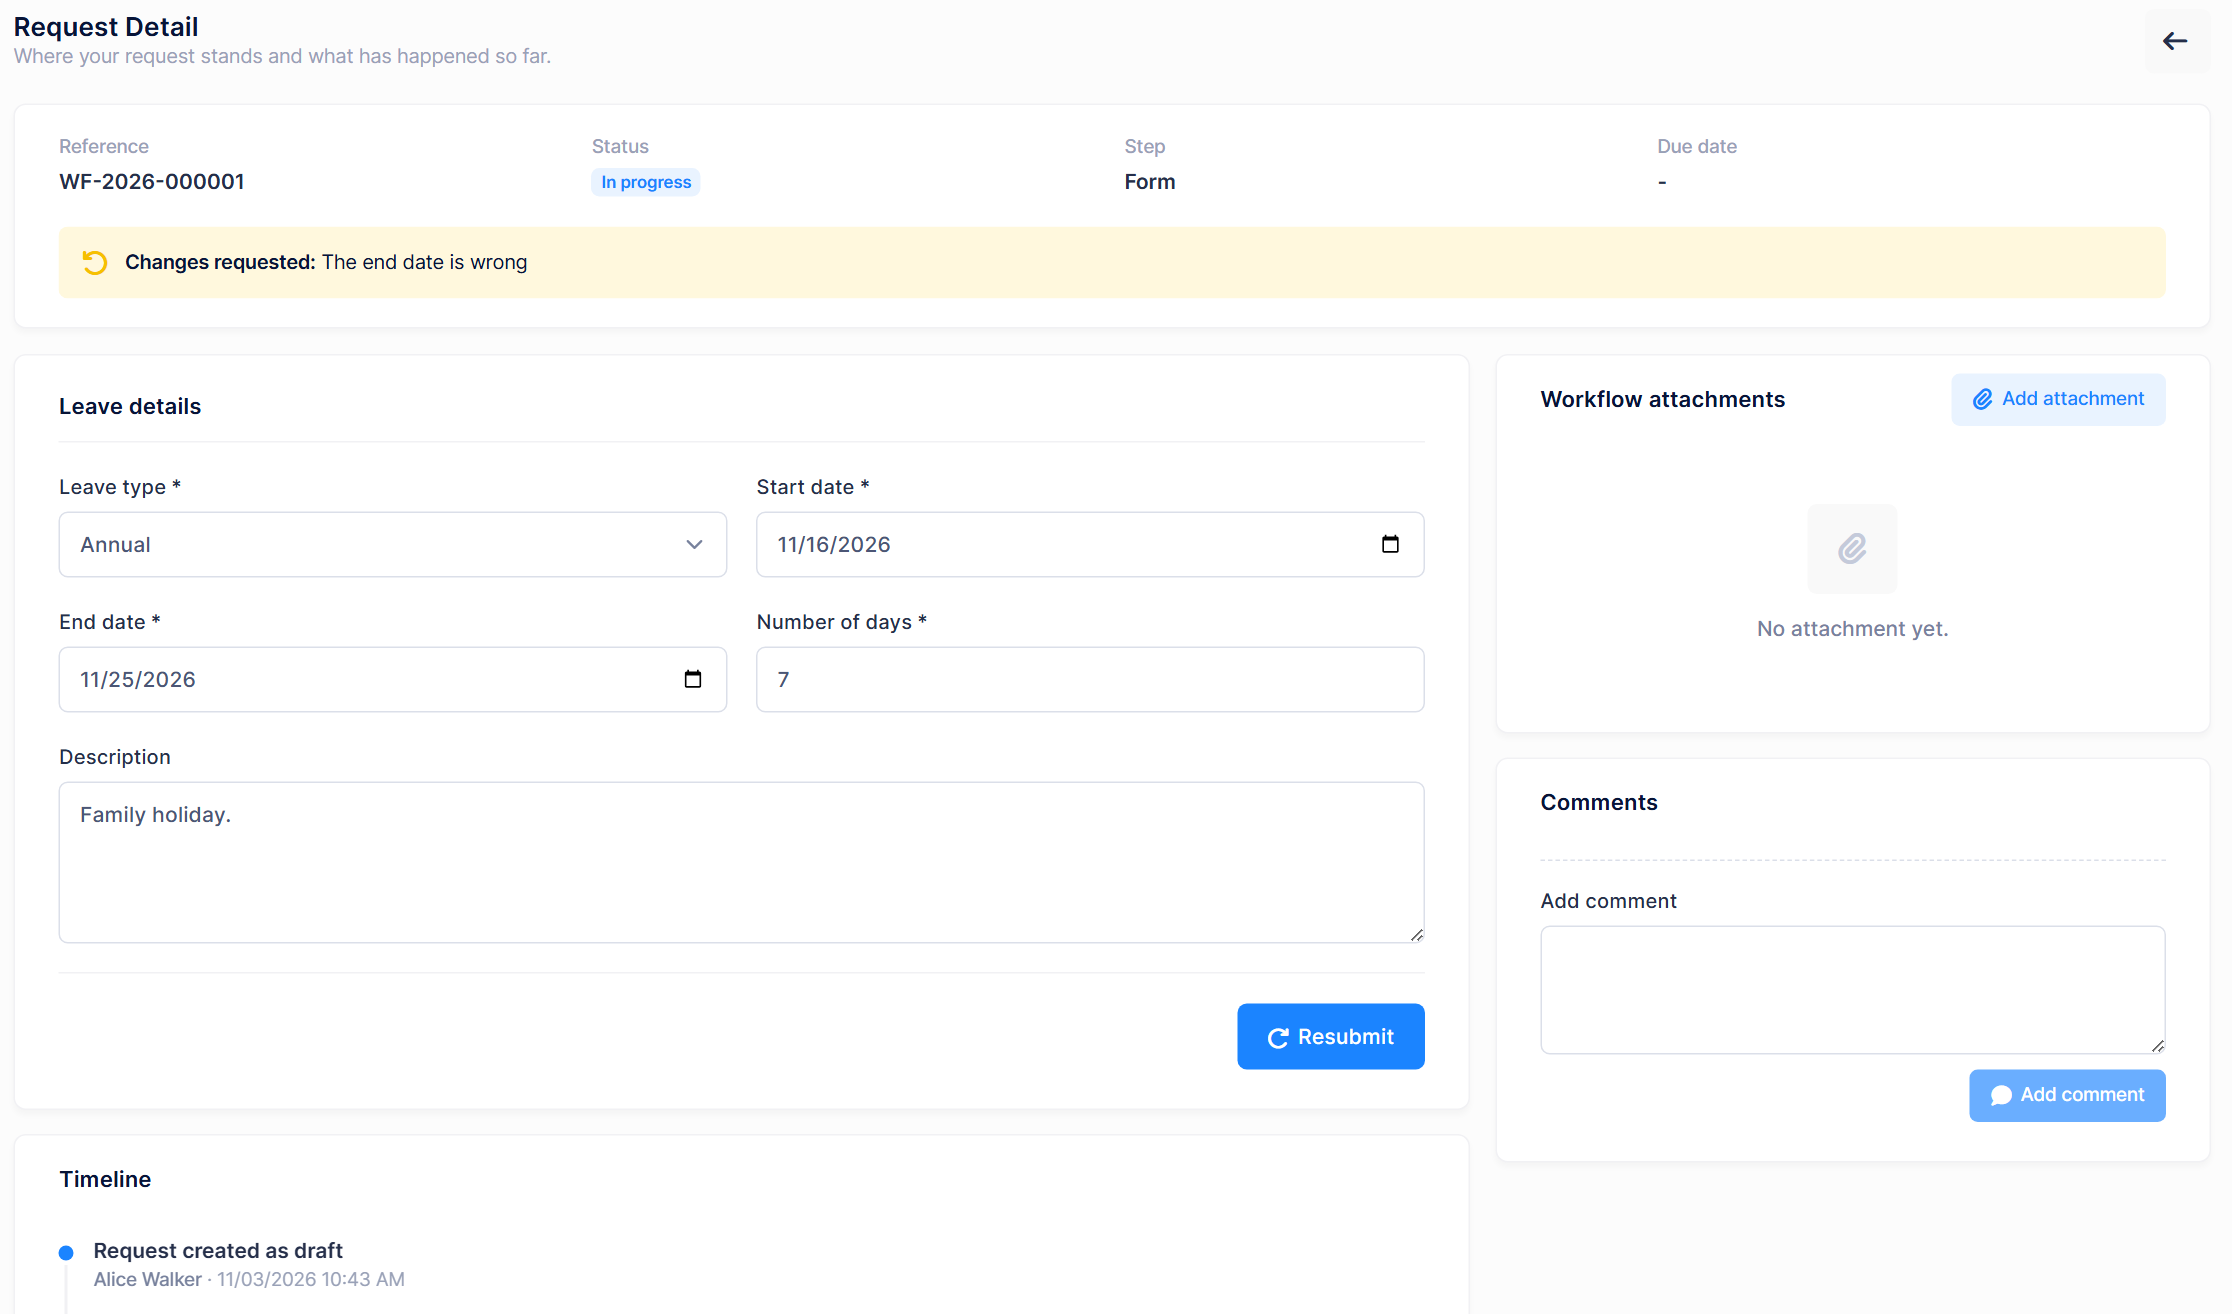
The request goes back to Alice with Bob's reason at the top of the page. She fixes the end date and clicks Resubmit.
Bob and Carol approve
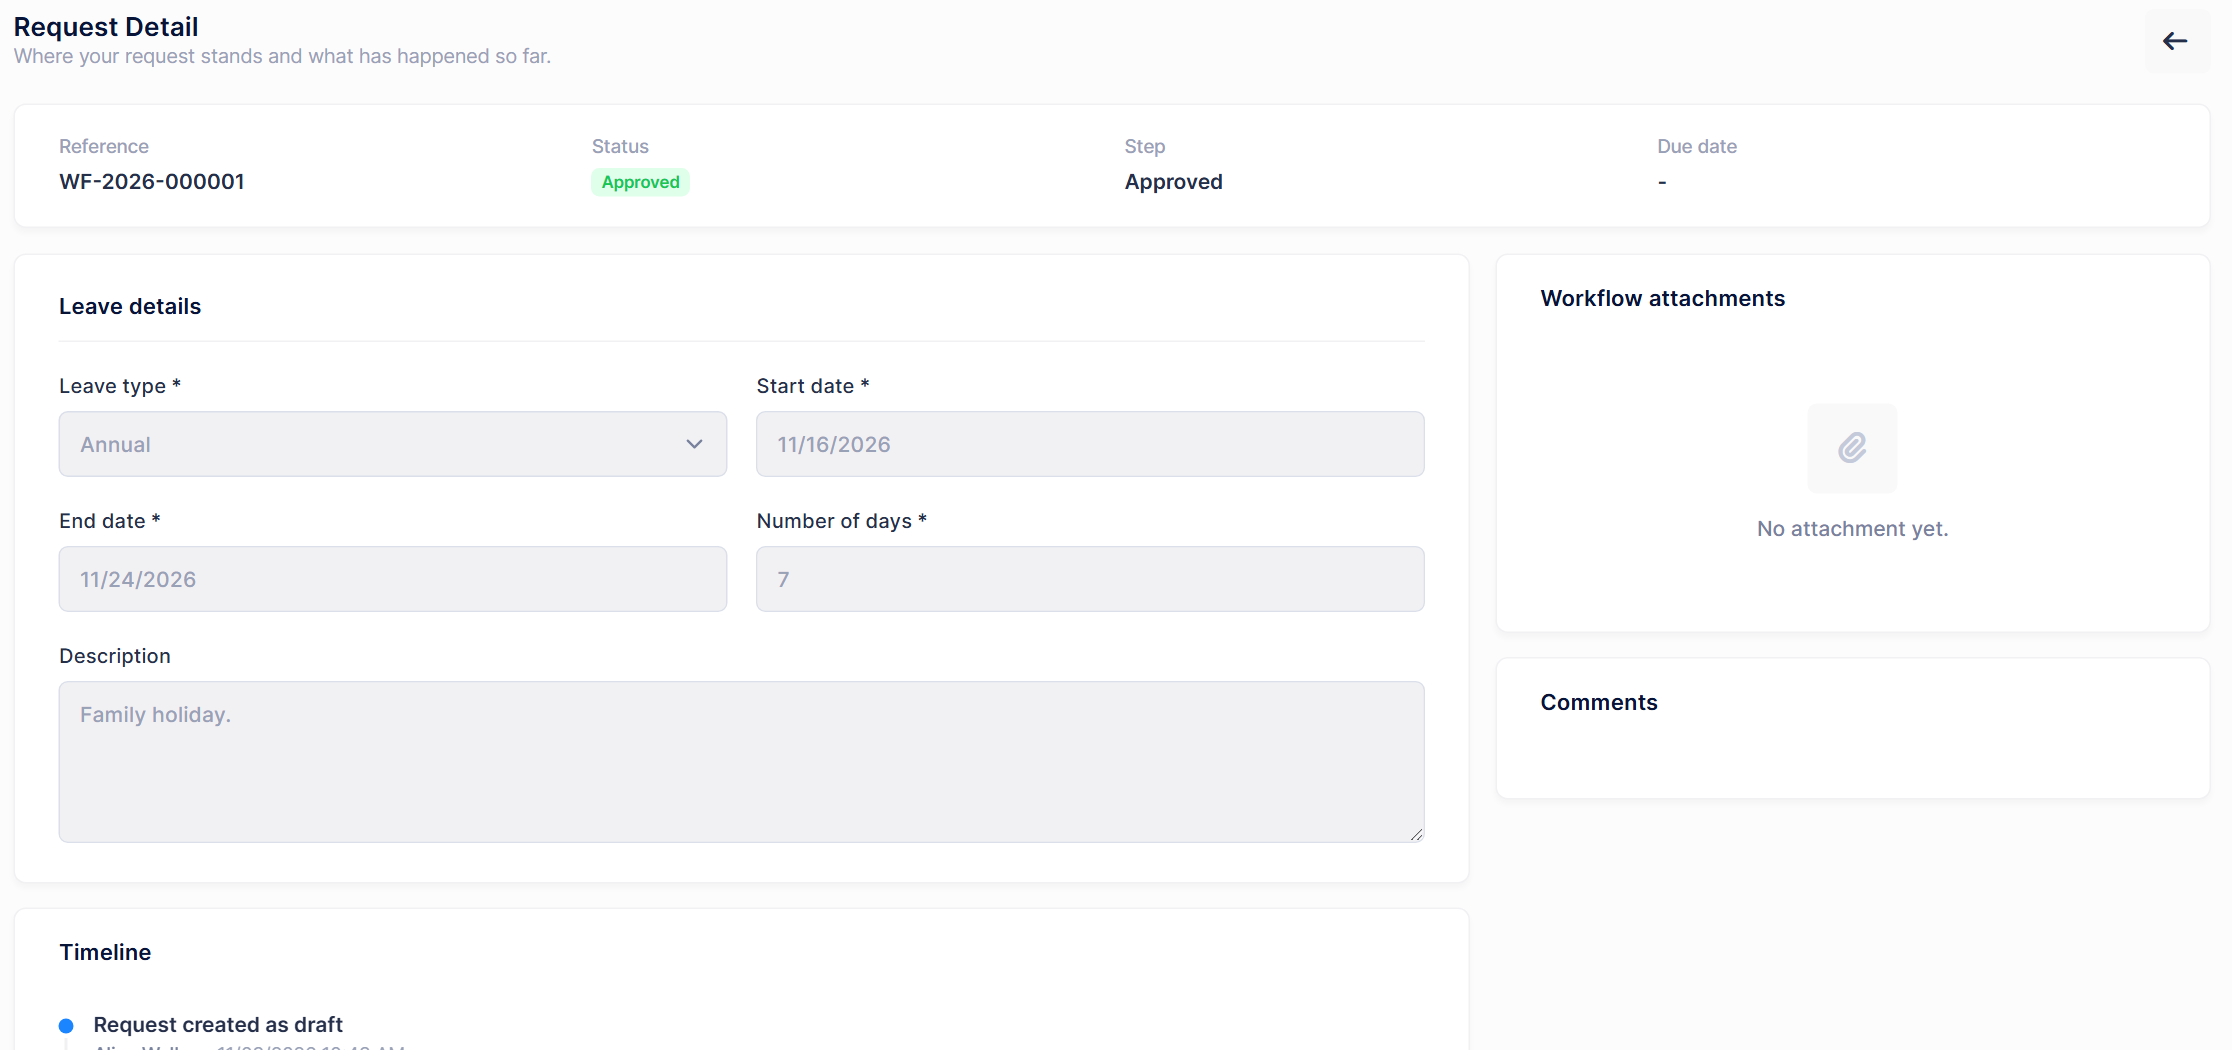
Bob approves the corrected request. Because 7 is greater than 5, the condition sends it to HR, and Carol approves it from her own inbox. The request closes as Approved, and Alice receives the "Your leave request was approved" notification.
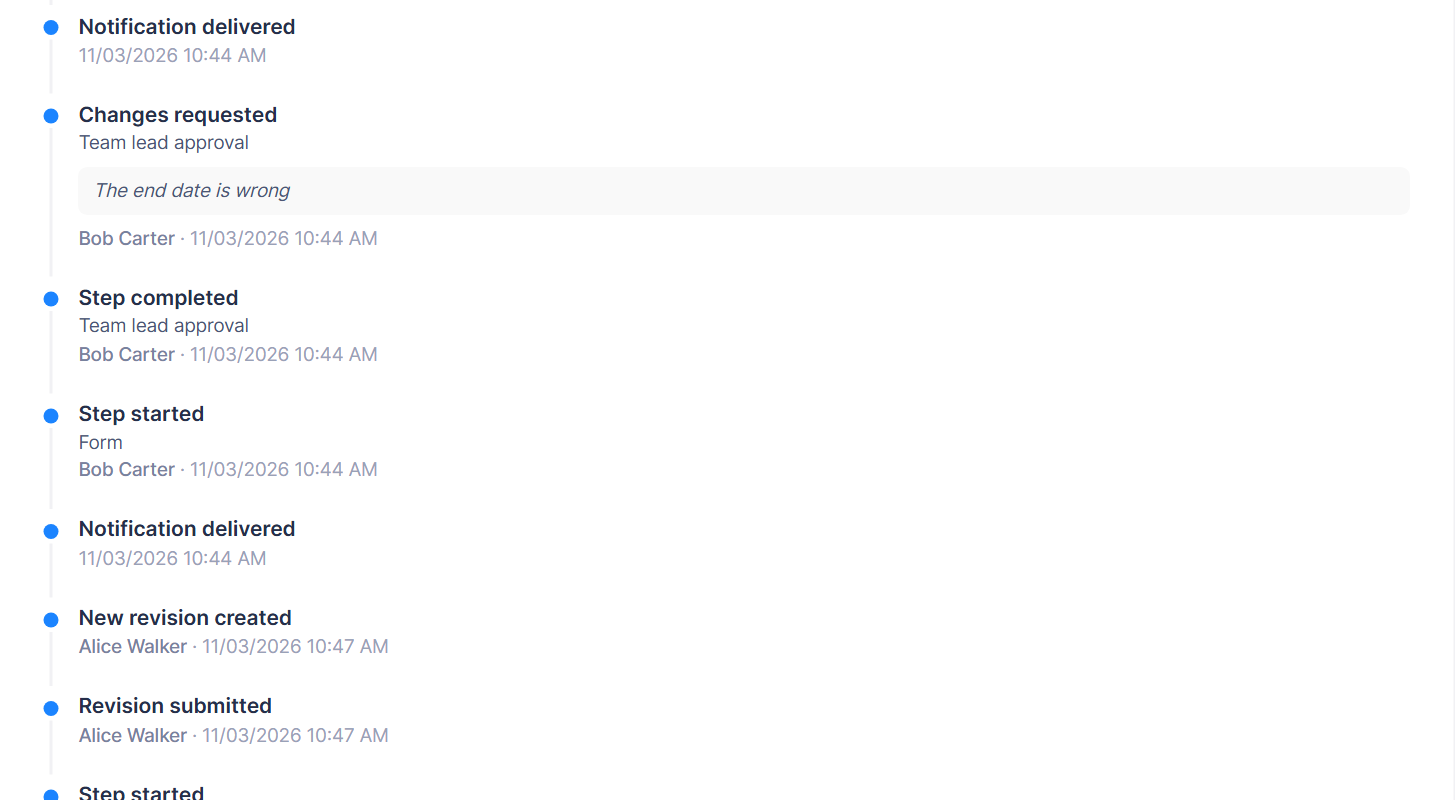
The request's Timeline records every submission, decision and notification, together with the person and the reason. This gives you an audit trail without any extra work.
If Alice had requested only three days, the request would have been approved right after Bob's decision, and Carol would never have seen it.
Changing the Workflow Later
Processes change, and the workflow can change with them. Open it in the designer, edit it and publish again to create a new version. Requests that are already running continue on the version they started with, so a change never disturbs requests in progress. If the host allows it, running requests can also be migrated to a newer version.
Beyond Your First Workflow
A leave request only scratches the surface. Here are some of the other things the builder can do:
- More flow control: Run branches at the same time with Parallel and Join, hold a request with a Timer, or start another workflow with a Subprocess.
- Holiday cover: Approvers can hand their tasks to a colleague for a period of time with Workflow Delegations.
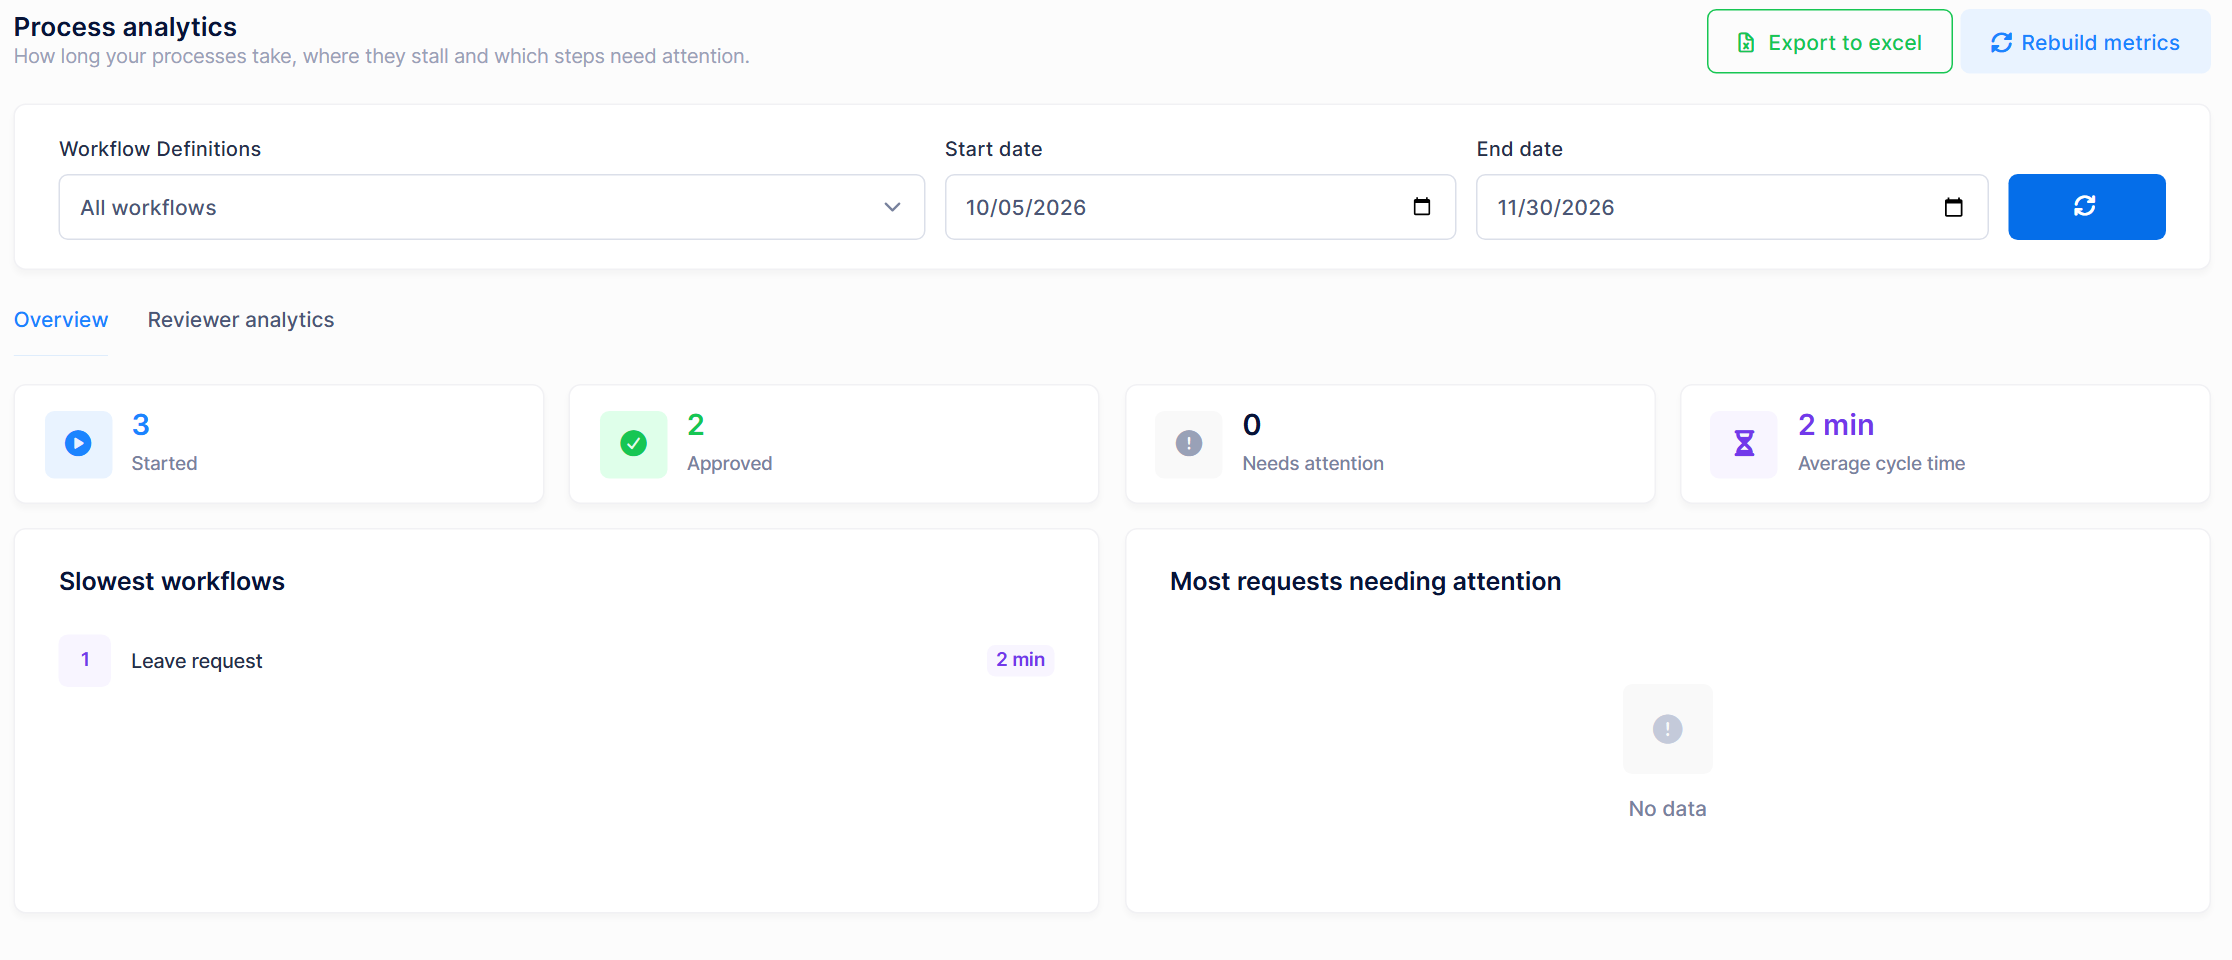
- Monitoring: Follow requests from Workflow Instances, Workflow Operations and Workflow Audit, and find out where your processes stall with Process analytics.
Hosts can also enable optional capabilities from Administration > Settings > Workflows:
- Scheduled and Public form triggers
- Action steps that call registered actions, webhooks and HTTP endpoints
- Wait for event steps that hold a request until an external system reports back
- Deciding from the approval email, or from Microsoft Teams and Slack cards
- BPMN 2.0 import and Elsa JSON import and export
- AI-assisted authoring to draft workflows from a description
Learn More
This post covers the main path. The documentation has every setting, and the tutorial walks through each click:
- Create Your First Workflow: The full step-by-step tutorial.
- Workflow Designer: The form builder, every step type, triggers, validation, simulation and versions.
- Requests and Approvals: Starting requests, deciding on tasks, requesting changes and delegating.
- Workflow Administration: Host and tenant settings, permissions and monitoring pages.
The workflow and approval builder is available in ASP.NET Zero v15.5. To see what else is new in this release, read Introducing ASP.NET Zero v15.5.
For questions, suggestions, or support, feel free to reach us at: 📩 [email protected]